It's the season to be joyous! Falalalala...

December is also the time I find myself "pigging" out with my loved ones. To me, that's one of life's simple pleasure - It just means we meet, eat and catch up on each others life.

Celebrating Xmas with my closer JC classmates is an annual event I look forward to. Over the years, contacts with each other is reduced as we move on to different life stages. But Xmas is the time we re-connect again. It's amazing how we can share the same jokes about our classmates and teachers over again, and never get tired of hearing it. It must be the shared experiences we had gone through that bonds us together.

This time, hubby persuaded me to get our first Xmas tree. We chose a real pine tree from Ikea, which we transported back on our own. And we love the smell of the tree in the house. So fresh and natural! Only downside is it keeps shredding pines, especially when my mischievous cat tries to play with the decorative balls.

There she is... checking the tree out!

We managed to put it all together. Ah.. my beautiful tree! And it brings warmth to my heart as I sat on my sofa looking at it, seeping my favourite drink. I must say it's therapeutic in some way, seeing the lights lit up the tree.

All dressed up and looking good!

To immerse self into the festive moods, I decided to bake. (How can I miss this chance to use my precious mixer and oven? *grin*) It's non other than the classic gingerbread men! As usual, the recipe I chose caused it to ballooned up, and it went from slim to... FAT.

Designed by me

Nonetheless, it still looked cute right? Even hubby tried his hands at designing one...

Designed by him

But he gave up after two, as my royal icing was a bit stiff for him to handle.

I finally realized it's the baking soda that causes it to change its shape. I tried another recipe and the shape holds well. But taste wise, the one with more baking soda tastes better. The rising agent causes the cookie to be more chewy and fluffy (meaning not so dry). But if we are wanting to use it for decorations, a drier cookie would be better. Ultimately, it's your choice. Think I'll stick to my "fat fat" cookie recipe for now. I just like the taste better as it calls for less molasses, and more butter.


Recipe (taken from allrecipes)
- makes about 24 large gingerbread men
 
Ingredients

A: 375g plain flour
     2 tsp baking soda
     (will reduce it to 1/4 tsp.. don't want the shape to change too much) 
     2 tsp ground cinnamon
     1 tsp ground ginger
     1/2 tsp clove (which i omitted)
     1/2 tsp salt

B:  225g butter, softened
      220g brown sugar
     1 egg
     30ml molassess (abt 2 tbsp) 

Method
  • Mix everything in A together. Set aside.
  • In a large bowl, using an electric mixer, beat together the butter and sugar till light and fluffy. Beat in the egg yolk, then the molasses. On low speed, gradually beat in the flour mixture (A) just until mixed. 
  • When everything is well combined, divide the dough into 3 parts, and roll each into a ball. Place each ball between 2 sheets of parchment paper / wax paper. Using your palm, flatten the ball into a disk, and roll out into a 1/4 inch thick. Chill dough for at least 30 mins, or until firm. 
  • Cut out cookies with cutters, using whichever shape you like, and transfer cookies to a baking tray (lined with parchment). Gather the scraps, reroll, chill and cut out more cookies.
  • Bake cookies at 190C, for 10-12 mins until the edges are faintly golden. Let cool on the baking tray for 1 min, then transfer to wire racks to cool completely.
Can check out my previous posts on making cookies for tips on rolling and cutting into desired shapes.

While checking FB, I was reminded by my friend that Xmas is a time of giving. Not in terms of monetary items such as presents, but in terms of your time. When was the last time you called or met an old friend, or expressed your love and concern for your parents and siblings? Now is the time.

Wishing all a Merry Xmas filled with joy and meaningful time connecting with those whom are important to us!


This may come a bit belated but I really want to share pictures on the ghoulish treats I had for my office's halloween party.

I took AM off, but woke up at the usual time for work to bake. Here's what I did:


I tried this last year, which turned into fat monster fingers. This year, it's looks so much better.

Witches' fingers
Still, it appeared bigger than I expected. I had chilled the fingers prior to baking it, and despite having done that, the dough spreaded out a fair bit in the oven. 

Overall, I'm still happy with it. Woo... doesn't it look eerie with a bit of spiders in it? I had also painted the almonds red which made it look more life-like. Too bad I don't have any red food gel. If not, I'll definitely add it it in to give the fingers a squishy look. 

My colleague managed to find these.


Here's other treats we had at the party:

Scooping out the "liver"
Spiders in the jelly

Syringes for the blood suckers - actually it's jelly too


Recipe for Witches' Fingers (from Martha Stewart)
- makes 30

Ingredients:
2 tbsp red food coloring
30 blanched almonds
2 eggs
1/4 tsp vanilla essence
113g butter
100g icing sugar
2 tbsp caster sugar
233g flour
pinch of salt

  1. Heat oven to 180C. Line two baking sheets with Silpats (French nonstick baking mats) or parchment paper, and set aside.
  2. Place food coloring in a shallow bowl. Using a small paintbrush, color one rounded half of each almond. Set aside to dry.
  3. Separate 1 egg. Set aside the white. In a small bowl, whisk together yolk, remaining egg, and vanilla. Set aside.
  4. In the bowl of an electric mixer fitted with the paddle attachment, combine butter, confectioners' sugar, granulated sugar, and salt. Beat on medium speed until well combined. Add egg mixture, and beat until smooth, about 2 minutes. Add the flour, and mix on low speed just until incorporated. Wrap the dough in plastic, and chill until firm, 20 to 30 minutes.
  5. Divide the dough in half. Work with one piece at a time, keeping remaining dough covered with plastic wrap and chilled. Divide the first half into 15 pieces. On a lightly floured surface, roll each piece back and forth with palms into finger shapes, 3 to 4 inches long. Pinch dough in two places to form knuckles. Score each knuckle lightly with the back of a small knife. Transfer fingers to prepared baking sheets. Repeat with remaining dough.
  6. When all fingers are formed, brush lightly with egg white. Position almond nails; push into dough to attach.
  7. Bake until lightly browned, about 12 minutes. Cool completely.
I think it was love at first sight! Who wouldn't, when Pooh Bear can be so cute... in 3D form.


And after setting eyes on it, I just had to go online to buy the cookie cutter. But unfortunately, my excitement didn't last long... for my first attempt in making the cookie turned out quite disastrous. The above picture is one of those surviving ones, where Pooh's legs are intact. The rest either had legs that are "chopped off",  or had cracks on their faces (due to my poor rolling technique). Poor Pooh! Feels like I was torturing it.


It was only recently when I had left-over dough that I took out the cookie cutter again. Used a different recipe but faced the same problem again. Even when the dough was all firmed up, I had difficulty releasing the dough from the mould after cutting it. Maybe there are simply too many lines on the cutter. I'm not sure... but I have no problem with the dough using other types of cutters. In the end, I have to wait for dough to chill, cut, and try my best to unmould it without any parts coming off... It is exhausting!!!

the cookies cutter - can you see the lines? get imprinted too if I press too hard

These are the precious few that I made.

cheeky Pooh tries to sneak into the pic too


And I was thinking to myself that it would be a long long time before I used it again... till my sister came to my house, saw it, and got all excited. She was having fun biting off Pooh's head, and munching away happily. At that moment, I knew I'll be bringing out that cutter soon...


Butter Cookie Recipe
(adapted from Very Merry Cookie Party: How to Plan and Host a Christmas Cookie Exchange)

200g unsalted butter
160g caster sugar
1 egg yolk
1 tsp vanilla extract
1/4 tsp salt
280g flour

  • In a large bowl, using an electric mixer, beat together the butter and sugar on medium speed until light. Beat in the egg yolk, then the vanilla and salt. On low speed, gradually beat in the flour just until mixed. The dough should be medium-stiff.
  • Divide the dough into 3 parts, and roll each into a ball. Place each ball between 2 sheets of parchment paper / wax paper. Using your palm, flatten the ball into a disk, and roll out into a 1/4 inch thick. Chill dough for at least 30 mins, or until firm.
  • Cut out cookies with cutters, using whichever shape you like, and transfer cookies to a baking tray (lined with parchment). Gather the scraps, reroll, chill and cut out more cookies.
  • Bake cookies at 180C, until faintly golden. (Times vary depending on size of your cookies. I chilled all the cut-out cookies in the fridge first, and baked each tray for 10-12 mins.) Let cool on the baking tray for 1 min, then transfer to wire racks to cool completely.

I did have a special tool though - a cookie slate to ensure that the dough is of the same thickness. Helpful tips on using the cookie slat can be found here. I was lucky to find this at Daiso for $2, and my neighbour kindly helped to saw into the length I wanted.


It was a breeze to roll the dough with this tool... no more guess work or "aga aga" (in hokkien, it means estimation). Just a note on cleaning it, the wood shouldn't be soaked. Just have to wipe off the grease, or if you really can't stand not washing it, rinse lightly and let dry completely before keeping.
"Busy Busy Busy"- this is a quote by my Box-exercise instructor. He always say "You busy people need a stretch!" And this describes me for the week. For the past one week, I've baked close to 270 cookies - heart shape, star shape, and even a Pooh Bear design.  You must be thinking I'm crazy right? But before you go on to wonder if I've gone mad, I've NOT! It's because I was preparing for an event - Bryan's first month celebration. The cookies are meant as a gift for the guests.

Bryan is my good friend's baby boy, and today we are celebrating him! See how cute he is! Managed to catch him in action, as he gave a little stretch while sleeping =)


This is his handsome side profile! So much hair.. must be the envy of many parents!


And this is the final product - after 2 intensive days of baking.

ready from the oven

tags - designed by sis

box brimming with cookies


When I took up the challenge, I didn't know if I could make it. But within a week, my knowledge about cookies also grew with the amount I've baked. I'm now 'pally pally' with cookie doughs. We are like good friend, and I can tell it's mood (whether too stiff or soft), or how best to roll it to give even thickness.

And I've also grown to appreciate the marvel of the simple dough and its many creations. The dough is actually very simple to make, but the rolling and cutting out of the shape is no joke. I've learnt through the hard ways where you simply add more flour to prevent it from sticking together, but this will yield a tough dough... till I met my master - the Cookie Craft. Couldn't accomplish this feat without it!

Anyway, I'm going to have my well-deserved rest! Posting of the recipe and my other silly attempts will be up in the next post. Here's to a good weekend!
As the saying goes, "Looks are deceiving!" - and this is very true for these cookies.


Ok... perhaps it's my amateur photographic skills, and therefore I couldn't do justice to it. Never mind, let's take a closer look.


I can't quite describe the shape, but according to the author, this is how it should looked like.


I've people commenting how come it's not soft, like those from Subway. Yes.. that may be the natural association, as Subway has made famous the oatmeals. I stood my ground though, that these are  unique, made by yours truly, and nowhere comparable to those mass-produced biscuits.

I find those from Subway a tad too sweet... but I still eat them *guilty look* However, these crunchy ones takes oatmeal cookies to a different level, and I would even say there's no need to add raisins. It's good as it is (really!)

Recipe: (from 猛老師的100多道手工餅乾)-  makes approx 12 large cookies
50g brown sugar
50g butter, unsalted
50g instant oatmeal
15g egg yolks
60g cake flour
25g icing sugar

Method:
  • Melt butter and sugar in a bowl, using the double boiler method. *According to the author, one can switch off the flame once butter has melted; it's ok for sugar grains to remain
  • Add in instant oatmeal. Mix well. 
  • Add in the egg yolks. Mix well.
  • Add in cake flour and icing sugar (to be sieved first). Mix till well-combined.
  • Wrap the dough using clingwrap, and chill in fridge for 30 mins. 
  • Once ready, roll the dough into a 20g ball, and place on baking tray. Using your palm, flatten the dough till it's about 7-8cm. *Be careful not to make the sides of the cookies too thin 
  • Bake in pre-heated oven at 160C for approx 25 mins. 

Helpful tips I picked up from the book:
One has to pay close attention to the color of your cookies. Not good to stick to one temperature, which should always be adjusted depending on how fast your cookies are browning.

I find that the bottom tends to brown faster.  Will switch to top heating when that happened.

You can always refresh cookies by baking it at a low temp (about 120C) for a few mins. That will make it crunchy again, as sometimes cookies absorb moisture from the environment.
Chinese New Year is here!

And in every celebration, there is always food to look forward to. Haha... It's time to indulge and enjoy the festive season.

Unfortunately, I think I started too early and am experiencing some "heatiness" now. Symptoms are showing... Hope it doesn't get worse in the days to come =P


This is a recipe I've been keeping for a while. I first tasted it during one of the bake sessions with my youths. It tasted good! Not too sweet, and even the parents wanted more of it... (much to the delight of the youth).

As icing sugar is used, it has those melt-in-the-mouth taste. The subtle aroma of the coffee greets you before you bite into it.


Recipe (yields about 60 cookies, can fill 1.5 plastic cookie containers, good to double portion)


Ingredients
150g butter
80g icing sugar
1 egg white
1 tsp of coffee essence*
120g plain flour
30g cornstarch
50g ground almond
50g tapioca flour

*I replace with coffee paste (1 tbsp of coffee powder + 1 tbsp of hot water)...  suspect cookie may taste sweeter if coffee essence was used


Method
  • Beat butter and icing sugar till smooth. Add in egg white and coffee paste. Mix well.
  • Fold in sifted flour, cornstarch, ground almond and tapioca flour. Mix until just combined to form a dough.
  • Roll small dough about 7g each, and arrange on baking tray. Brush with egg yolk. Bake at 170C for 15 mins, or till lightly browned.
It's 2am in the morning... Thoughts are running, and there's this urge to write!

It's a good sign, and this probably came from the encouragements I've been receiving from Lena and Bakertan. I realized my priority has shifted since I went back to work. Less time to bake, and the urge to write has greatly decreased too...

Not today though. Thanks to my blogger friends! They made me realize this is a part of me I want to keep. It is also a space I can interact with others, and to grow in my baking skills.

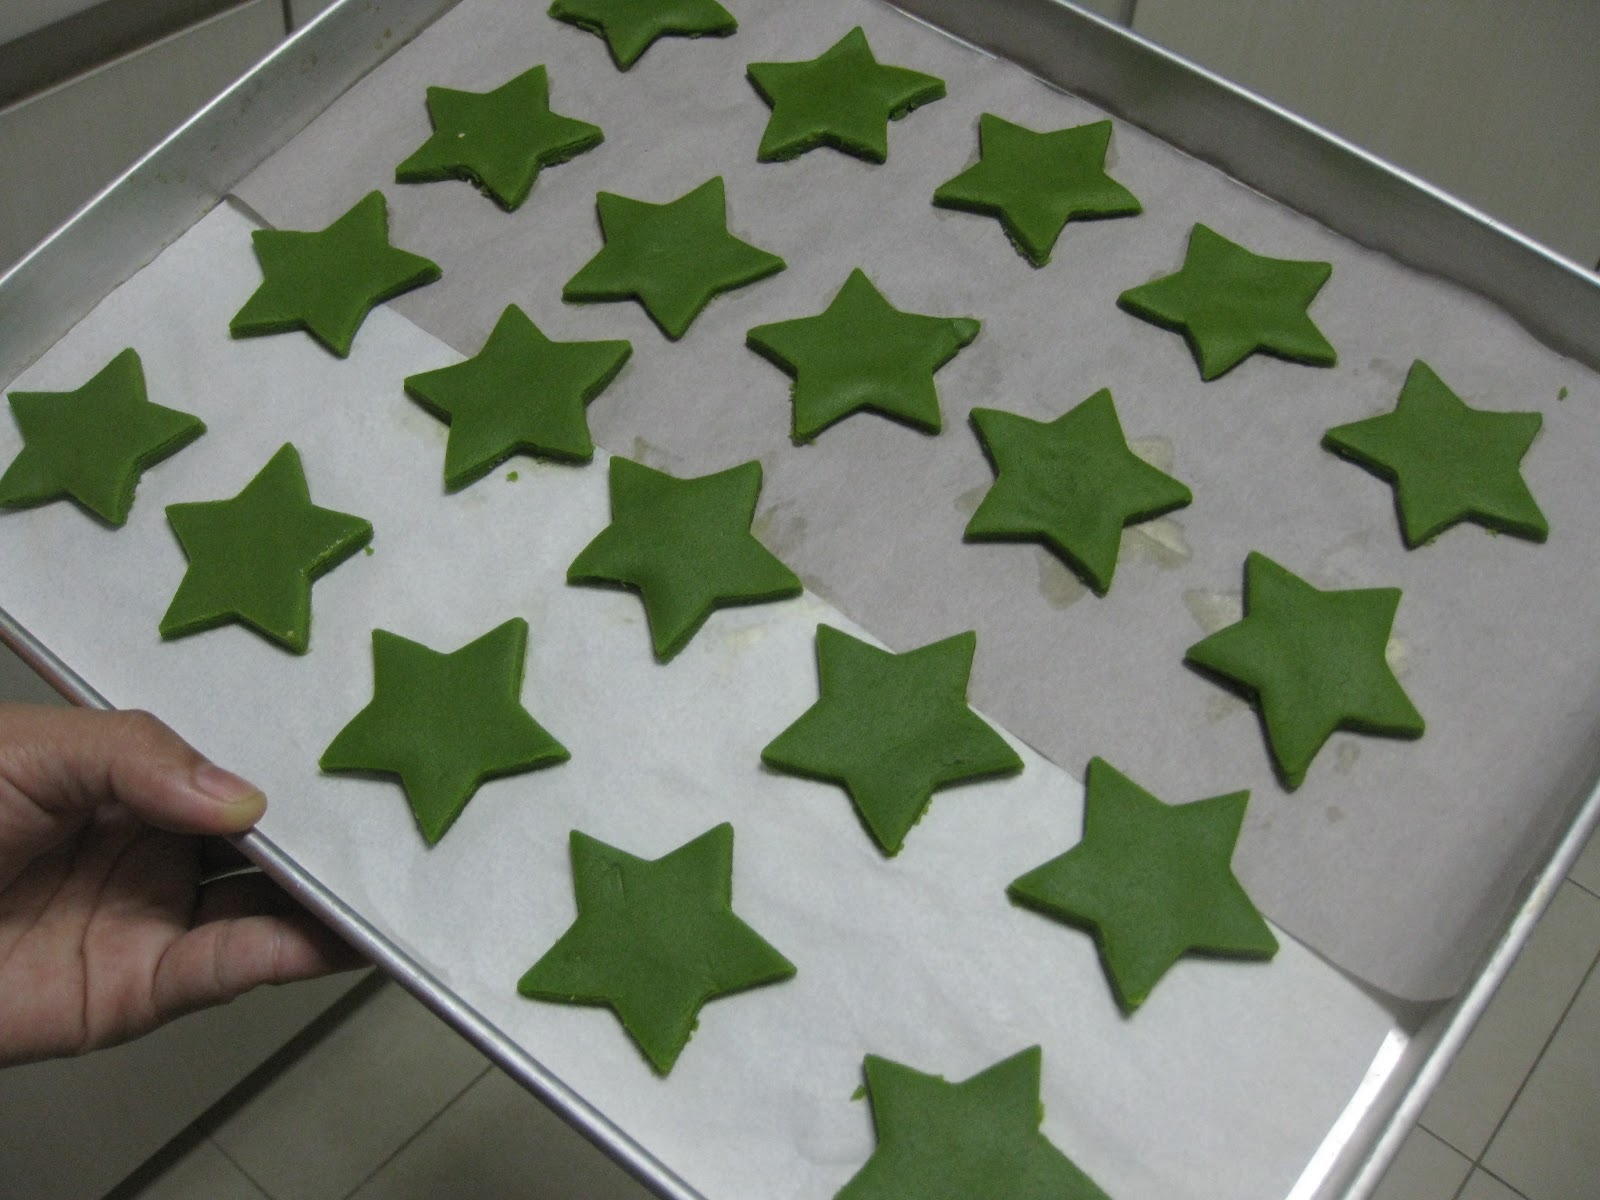
I was glad when my sister suggested baking cookies together. This is the result of our combined efforts - Green Tea Cookies.


The cute gingerbread man is a gift by my sister. She made it herself.

Before - dark green in color


After - brownish green in color

As for the cookies, my first thought was that it's not sweet enough.  But as I eat it again the second day, I grew to like it (a lot). The flavour of the green tea comes out well, and is good on its own / with tea.

Recipe:  (adapted from Honey Bee Sweet)


Ingredients
240g plain flour
10g green tea powder
150g unsalted butter, cold and cut into small pieces
1/4 tsp salt
100g icing sugar (can increase if you like it sweeter)
1 large egg yolk

Method
  • Sift flour, green tea powder and icing sugar into a big bowl. Add in salt. 
  • Add in the cold butter. Using your fingertips, knead it in till it resembles bread crumbs. 
  • Add in the egg yolk, and knead till well-combined. 
  • Divide the dough into half. Wrap each portion with clingwrap, and chill in the fridge for 30 mins before rolling out.
  • Lightly flour the work surface. Take out 1 portion of the dough, and roll out till 1/4 inch thick. Cut into shapes using star cutter. The remaining dough are put back into the fridge, and the same steps are repeated with the second dough portion. * To get dough to chill faster, I put it into the freezer (10 - 15mins is all it takes for the dough to firm up)

  • Arrange cookies on baking paper, and chill in fridge for 20 mins. Preheat oven to 175C.
  • Bake the cookies for 13-15 mins till the edge are lightly browned.

Am submitting this for Aspiring Bakers #14: Creative Christmas Bakes (December 2011) by Hankerie.
I'm hosting a Halloween Party with friends, and that gave me a good reason to whip up some halloween treats.

I was very pleased when I saw how the cookies looked, after moulding it into the shape I wanted.. haha doesn't this look like witches' fingers - slim and pointy?


But to my horror, it became like this after I baked it.


The size had doubled, and it has become monsters' fingers. Thankfully, it still fitted with the theme. My friends had lots of fun, using it to poke each other, or pretending to dig their nose. I'm truly amazed with the ideas they came up with to 'use' the fingers.

The recipe was taken from here. The video acted as a useful reference on shaping the fingers. Instead of yeast, I substituted it with baking powder... finds it weird to use yeast for cookies =P . Anyway, you can easily google for witches' fingers and find similar recipes online.

Since I wouldn't be posting the recipe,  here's sharing more pictures of the decor I've put up :)

mr skeleton - he's a friendly one :)

Trying to create the halloween look

haha... catch me if you can

bloody fingerprints

it's mine.. don't you dare take it away from me!


Am sharing this on October Event hosted by Hankerie


This is a special request by my friend. Her right foot is injured (and I know she is worried if it will get well), so I decided to make this to cheer her up. She loves all things chocolate, and I know she will like this. She's a great friend who always has something encouraging to say about my bakes, and I know I can count on her to be there for me too in times of need.

I can't remember when was the last time I stayed up late to bake something. I think it has never happened before, for I'm a person who usually has to sleep early, especially if the next day is a working day. So now that I'm not working, I can do things like this (it's actually a very shiok feeling to be indulging in one's hobby, and I do treasure these moments).

waiting for cookies to cool

trying to play cookie stacko hee...

'message' for my dear friend

all my loves - cookies, packaging and polka dots

Seeing her enjoy the cookies, I regret not packing more for her. This recipe is a keeper, and it came from a cookbook I got as a gift last year :) I'm gonna bake this with the youths tomorrow too, thus the recipe posted below, are worded in a way that is easy for them to follow. So bear with me, if the sentencing and grammars appear weird to you...

Here's the recipe: (adapted from The Great Bake Sale Cookbook - 75 sure-fire fund-raising favorites)

Ingredients - yields approx 35 cookies
(A) 210g plain flour
     1/2 tsp baking soda
     1/4 tsp salt

(B) 140g brown sugar
      40g white sugar
      100g butter
      1 large egg
      2 tsp vanilla essence

(C) 1/2 cup semi-sweet chocolate chips

Method
  1. Pre-heat oven to 190 deg C. Line the baking tray with parchment paper.
  2. In a medium bowl, measure out the flour. Add in baking soda and salt. Mix everything together. Sift (A) into a bowl. Set aside.
  3. In a large bowl, using a wooden spoon, cream the butter and sugar (both white and brown) till soft and fluffy. (approx 2-3 mins).
  4. Beat the egg, and add it to the batter. Add in the vanilla essence. Stir till everything is well combined.
  5. Add in the sifted flour, and mix it into the batter.
  6. Lastly, stir in the chocolate chips.
  7. Drop the dough, using a teaspoon onto the baking tray. Remember to space out the cookies.
  8. Bake cookies until golden on top, approx 10 to 15 mins.