It's been a long while since I had a post. I have been wanting to write and to bake... but somehow it was difficult to summon energy for it. 

I began to wonder how I want my life to be - to fill it with work,  or at times allow myself to be idle and dream of cupcakes, cookies and the many things I want to bake in my kitchen.

And it was timely that I came to read this article by Tim Kreider. He talked about people who are afraid of having nothing to do, and therefore they try to fill their time with many things, and making sure they always have SOMETHING to do. These are the people whom you want to invite for lunch, and they would say "I'm busy" or "I'm sorry. I have too much work to do." Tim described this sense of busyness as being being imposed onto the person by themselves. I must admit that article got me a bit uncomfortable, and to question the way I use my time. 

He then went on to talk about the beauty of being idle, and I'll share with you my favourite part:
"The space and quiet that idleness provides is a necessary condition for standing back from life and seeing it whole, for making unexpected connections and waiting for the wild summer lightning strikes of inspiration." - Tim Kreider

This is but a simple reminder that when one has nothing to do, one may achieve a lot more.

Guess I'm not so bad afterall. I did manage to bake occassionally *gives a guilty face*, and I fulfilled my wish to bake this cute panda bread too.


Learning from my previous experience, which I felt the amount stated by the original recipe for the dough was too little, I decided to fall back on my milk loaf recipe. Hmm... but I encountered the same problem when trying to mix in the colors for my dough. What I got was a marbled colour, and I almost wanted to give up and just go to the Singapore Zoo to get some panda buns instead. 

Fortunately, once baked, the color still looked alright! 


Recipe
Bread dough - from milk loaf recipe

Coloring of the Panda Bread
1 tbsp green tea powder mixed with 2 tsp hot water
31/2 tsp of cocoa powder mixed with 11/2 tsp of hot water

Method
I followed the steps from lilmizlynn

It's been too long since I made bread using a pullman bread tin - thus overcooked the bottom a bit. Notes for self: To place the bread tin on the wire-like rack, instead of the black colored baking tray! 

Though I followed the guide by lilmizlynn, it does take a while to get the proportion right, and to build the shape. I may make the white portion smaller, and the green portion bigger. 


Have fun experimenting with the recipe, and enjoy the results of your hard work - a peering panda face!
It's bread again.

Am making a conscious effort to blog... and all these made possible with an Ipad and a ultrathin keyboard (that's super duper cool!) Whenever I whip it up, people would go "wow", and I don't have to worry about clumsy fingers trying to tap on the screen. I love it! All thanks to my wonderful dear who gave it to me as a present. *Blessed*

This was meant to be a panda bread. But my skills are rusty now, so I ended up adding too much water to the green tea and chocolate powder. The color ended up in streaks. That's how it became a tri-colored bread.

It's still pretty! And I tried to practice my braiding. Ended up with these:


Will post up the recipe when my panda bear is up =)


I'm back! Nothing is more soothing to the ears than the sound of my mixer at work.

And this time round, I have a new gadget... *drum roll please"

Here's introducing to you my....


.... Handheld blender!

I've been eye-ing it for the longest time, and my kindest dear actually redeemed this using his credit card points. With this gadget, pureeing food (in small quantity) is a breeze now. Fuss-free and easy to clean, this will motivate me to make more sauce/dip/soup.

The "inside" of the blender

The bread recipe used is my all-time favourite, and I've adapted it into different flavors before. In this recipe, the carrot juice was replaced with spinach juice, which I made by combing 20g of spinach (Western kind) with 40ml of water.


Hmm.. in some ways, this bread reminded me of Popeye who needs to eat Spinach for strength.


To be honest, work has not smooth. Perhaps it's the sign I needed to press on, despite challenges.

I'm a fighter! What does not kill me will only makes me stronger!
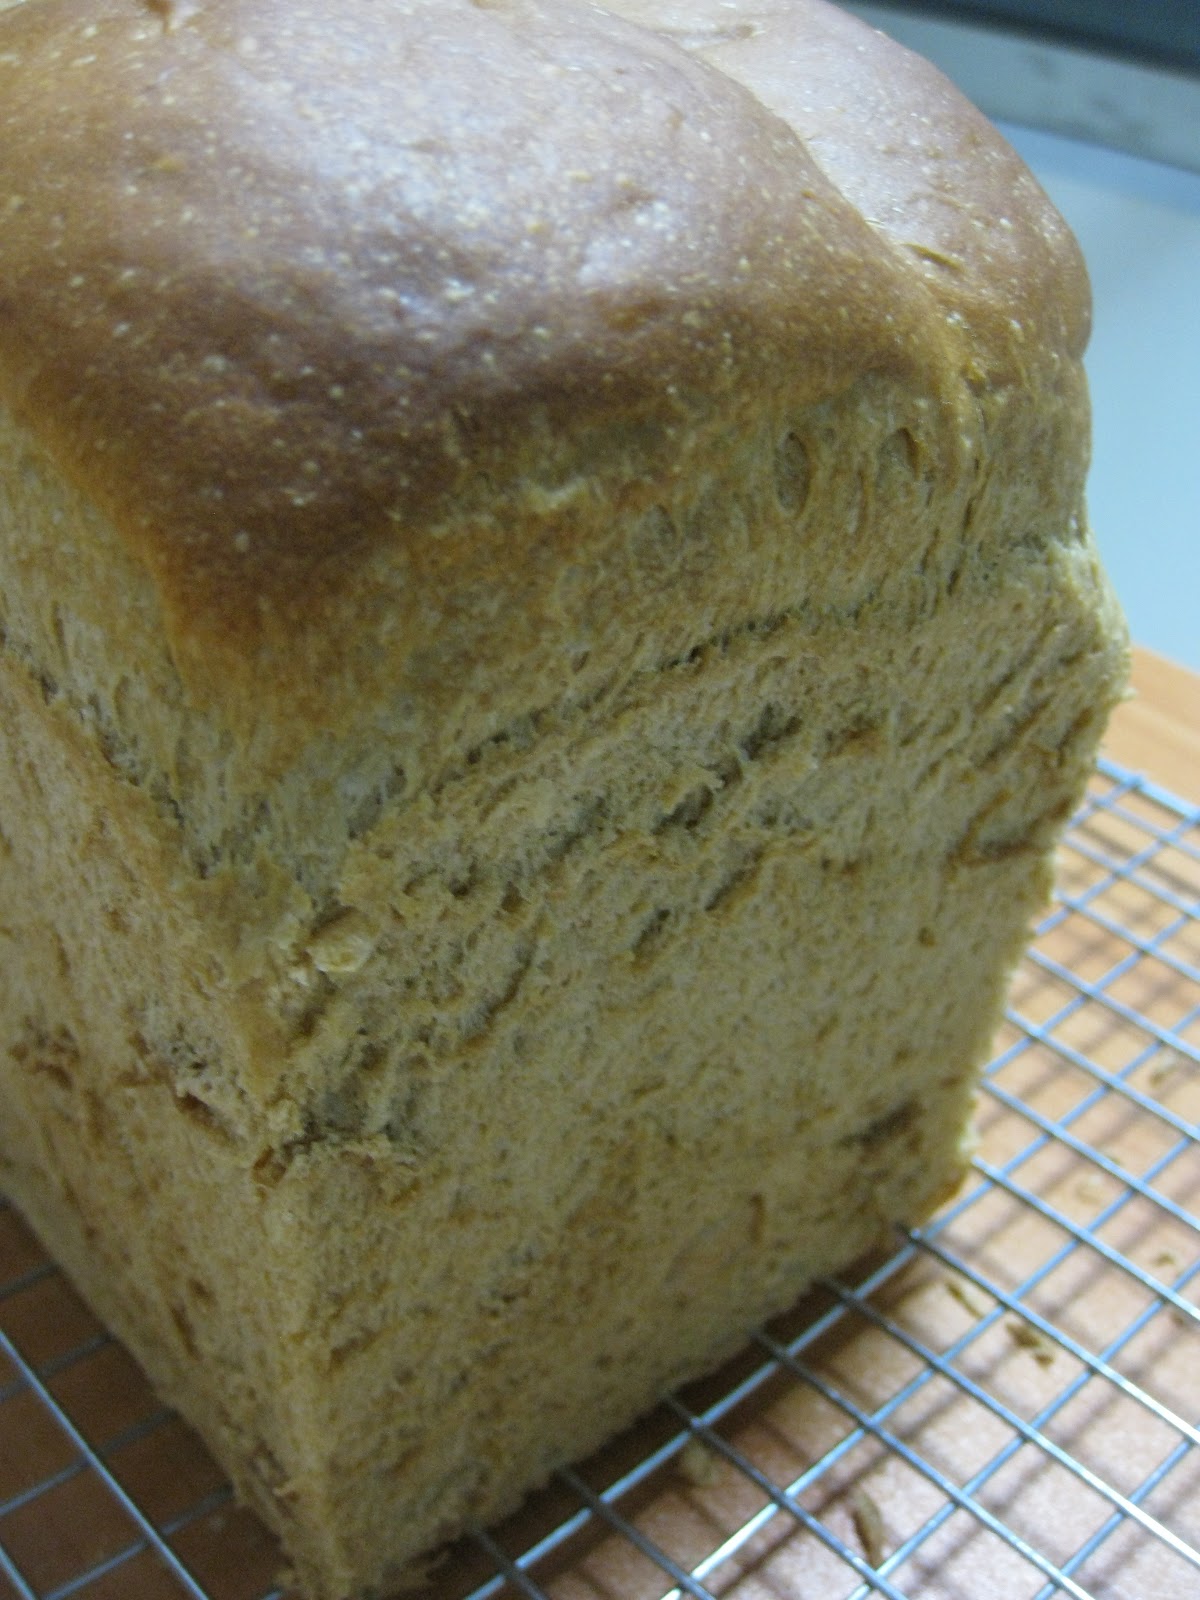
It's been a long while since I dare put up photos showing a LOAF.


That's because I've great difficulties removing the bread from the tin. Once out of the oven, it will stick to the sides and bottom so tightly - refusing to budge despite attempts to shake it out of the tin.

Out of exasperation (& desperation), I'll use a spatula to loosen the edges. And before turning the tin over, take a deep breath, secretly praying  that everything will be fine. But often time, what greeted me will be a loaf where bits of the sides are still stuck to the tin. Yucks! Real ugly! My heart sank, greatly disappointed.

I needed to problem-solve. Hmm... perhaps greasing it might work? It didn't.

Another idea came to me. How about greasing it with butter? It helped - only for 1 time.

Hmm... What about greasing with butter followed by flour? I found my answer. And the bread slide out of the tin beautifully this tin. Ahh... Happiness!

And now back to my bread, it's a Hokkaido Milk Loaf - famously know to yield a soft and flavorful bread due to the addition of milk powder, milk and whipping cream.


On first bite, it tasted like the ordinary white bread, but as I chewed on, I begin to feel the milky flavors coming out - subtle and this requires a 'veteran' tongue to taste it.  My husband couldn't tell the difference between this and white bread... But I could. It's richer in taste. You have to try it to know what I mean.

cut into thick slices! yums!


Recipe (source: Angie's Recipes)

Ingredients
270g bread flour
30g cake flour
5g instant yeast
15g milk powder
40g sugar
4.5g salt
half an egg (beaten)
125g fresh milk
75g whipping cream

Method
  • Knead all the ingredients together until the window pane stage, using a mixer.
  • Place the dough in a lightly greased bowl. Cover with clingwrap, and let stand till double in size (approx 60 mins).
  • Punch down the dough to let out the gas. Divide into 3 portions, shape into rounds and let it rest for 20 mins.
  • Flatten and roll each portions like a swiss roll. Place in bread tin and let rise till it reaches 80% full.
  • Bake at 180C for 45 mins. 
Made a green tea bread recently. Love the color.


And this time round, I used a new recipe / method - 冷藏液種, taken from Bernice's blog. I'm supposed to mix the starter dough using my mixer... but I mis-read the instructions *oops*, and ended up with no bubbles in the pre-fermented dough (refer here). Luckily, the bread still turned out soft.

As the bread was a success, I decided to make another loaf for my friends. This time, I used natural green tea powder, instead of bakeable green tea powder. I've been feeling uncomfortable whenever I read the ingredients list for the bakeable green tea powder... However, when I innocently replaced the bakeable green tea with natural green tea, the bread turned out brown with no hints of green tea smell.

I was shocked. And all along what I thought was natural turned out otherwise. I needed some time to digest this news, and decide if I want to eat green tea bread and cakes again.

But I love green tea! My sister pointed out perhaps I should check out what the Japanese bakers used for their desserts. Or did I buy the wrong type of powder?


This bread is slightly sweeter. Tastes good on its own or with a slab of salted butter. The salted butter provides a constrast to the sweetness of the bread.

Recipe:
170g bread flour
50g caster sugar
2g salt
4g instant yeast
1 egg
25g unsalted butter
37g fresh milk
150g pre-fermented dough
5g green tea powder

  • Knead all the ingredients together, except the butter.
  • Add in the butter after gluten has developed.
  • Continue to knead till the dough reaches the window-pane stage.
  • Place in a lightly greased bowl, and let it proof till double in size.
  • Punch down the dough. Cut into 3 portions. Round it and let it rest for 15 mins.
  • Flatten and roll each portions like a swiss roll. Place in bread tin and let rise till it reaches 80% full.
  • Bake at 170C for 45 mins. 

Pre-ferment dough - enough to make 3 loaves, using a 450g bread tin

300g bread flour
300g water
1g instant yeast

  • Mix the yeast, using a mixer till it's well-dissolved into the flour (approx 15 mins).  
  • Let it proof for 1 hour at room temperature. Put into the fridge for at least 16 hours before using.
I wanted to make some bread for a friend, and decided to fall back on my trusted carrot bread recipe.

It's always a good feeling to know that the recipe will work. When I'm using a familiar recipe, it gives me confidence. Unlike times I'm trying new recipes... my heart beats faster... and I get a bit anxious wondering if everything will turn out well.

Anyway, my friend loves the carrot bread. I thought "Why don't I tweak the recipe a bit to create different flavors?" ... and the flavor that pops up in my mind was chocolate... hmm yum yum!!


As you can see, my bread needed more chocolate chips.


But I was glad that the color of the bread turned out well. Look at the shine! Doesn't it look like those from the bakery? Here's the trick: about 30 mins into baking, I tented the top with aluminium foil. But you really need to know how your oven works before deciding if you need this step.


I am quite pleased with the way the swirls turn out too.... Finally, after many rounds of practise, I found the way to rolling the dough =)

Chocolate Bread

Ingredients
143g chocolate milk
35g egg (beat a whole egg first, before measuring out the quantity needed)
25g caster sugar
5g salt
250g bread flour
4g instant yeast
38g butter (unsalted)
chocolate chips, approx 36 mini ones

Method
  • Place milk, egg, caster sugar, salt, bread flour and yeast into the mixing bowl. Mix all the ingredients together, until the dough comes together and gluten has developed.
  • Add in the butter, and knead until the window-pane stage. *Using my KitchenAid mixer, that took me about 30 mins. I usually start on a low speed (2) and slowly increase the speed to (6)
  • Place the dough in an oiled bowl. Cover with cling wrap and and let it proof till doubled in size. This will take about 60 mins.
  • Remove dough and punch out the gas. Divide dough into 3 equal portions. Each dough is about 164-165 grams. Roll and shape into balls. Let the doughs rest and relax for 15 mins. *Dividing the dough into equal portions will ensure all 3 parts can rise to the same height during the 2nd proof
  • On a lightly floured surface, flatten the round dough and roll it out. The rolled dough will still be circular in shape. Take the dough from the top and fold it towards the centre. Pinch down the seams. Take the dough from the bottom and fold it towards the centre. Pinch down the seams. You would have a longish dough now. 
  • Flip over the dough, so that the side with the seams face the floured table.  Roll out into a longish shape. 
  • Sprinkle chocolate chips onto the dough. Then roll up the dough swiss-roll style. Do the same for the two remaining doughs. *I would put 12 chocolate chips onto each longish dough, based on earlier experience
  • Place doughs in lightly greased bread tin/pan. Let the doughs proof for the second time, until it fills up 80% of the tin/pan. *I used to grease my tin with sunflower oil, but this time round, I tried with melted butter. Helps in removal, and gives the bread a nice color
  • Bake at pre-heated oven at 180deg C for 50 to 60mins. The bread is done when the sides are evenly browned. *I took 55 mins
  • Unmould the bread immediately when removed from the oven. Let cool completely before slicing.
Am sharing this on YeastSpotting
I've been making breads... lots of it recently. With the feasting starting from Christmas, to New Year and now welcoming the Dragon, I've been digging in a lot of good food. Hence, less cakes now.


I was first introduced to bagels by my husband. As he likes everything cheese, bagels fitted his taste bud perfectly, as it is often times accompanied by cream cheese.

But me? It's not really my "type". However,  I did eat a lot when I was travelling in Japan. It's because their packaging are really nice, and they comes in all sorts of flavor. How can you resist them when they look so delicious?

From L-R: green tea, blueberry, cinnamon raisin and maple walnut flavor

It is easy to make bagels at home. Definitely faster than 湯種 or 中種法. After proofing, the shaped dough is boiled in water before baking. The result is a dense and chewy interior with a browned exterior.
  
Recipe: (from The Sophisticated Gourmet) - makes 8 bagels    
(I halved the recipe to make 4)

Ingredients
2 tsp active dry yeast  (I use instant dry yeast)
22g sugar
300ml water
500g bread flour
7g salt

Method
  • Mix all the ingredients together till a soft dough forms.
  • Knead for 15 mins on a floured table top. The dough will become firmer as you knead.
  • Put into a big bowl which has been lightly greased. Let it proof for 1 hr or till doubled in volume.
  • Punch the dough down, and divide into 8 portions. Shape into round shape and let it rest for 10 mins.
  • Coat your finger in flour and gently press your finger into the centre to stretch the dough to form a ring. Place on a lightly greased baking tray. Cover with clingwrap and let it proof for 10 mins. 
  • Pre-heat the oven at 220C.
  • Meanwhile, bring a large pot of water to a boil. Reduce the heat. Use a slotted spoon to lower the bagel into the water. Let them sit for 1 min, and then flip them over to boil for another 1 min. If you prefer a chewier bagel, extend the boiling time to 2 mins each side. 
  • Place the boiled bagel back on the lightly greased baking tray. Bake for 20 mins, until golden brown.
  • Cool on a wire rack.

see the holes inside - indeed chewy!

Taste
I made it at night, and had it for breakfast the next day. It's superb with cream cheese!

Strangely, when I had it on the 2nd morning, it seemed to have lost its chewiness.

Overall, find that home-made ones are not as hard as those sold outside - which is just nice for me =)
I've always been in search for a method that can yield soft home-made bread. Not only must it taste good, it should also stay stay moist for a few days!!

Of course, I don't expect it to stay soft for 1 weeks... but I do like my bread to stay soft for 2-3 days (so that I have enough time to finish up the bread) Hee... don't think I'm expecting too much right?

And I finally found the answer through the following 2 methods - tangzhong and the use of a 17 hour pre-fermented dough. Both are commonly used by home-bakers in Asia, because it can yield a soft and moist bread. No bread improvers are used in both methods... and it's just healthy, healthy and more healthy! Alright... I got a bit carried away. But what I'm trying to say is when you use these methods, you wouldn't have all those chemical used by commercial bakery to prolong the bread's shelf life.

You may be wondering what is its secret then. Its secret lies in the preparation of a pre-dough, and the controlling of temperature. The tangzhong method requires a water-roux made at 65 degree celsius, while the 17 hour pre-fermented dough is left to ferment for 17 hours, at a very low temperature in the fridge. You can read more from here and here.

Since there is a coffee bread recipe for both methods, I decided to give both a try, and do a little comparison.

17 hour pre-fermentation method

window-pane stage?

the batter is real shiny!

rose high and tall

beautifully baked :)
Recipe: (for 1 loaf)

Pre-ferment dough
234g bread flour
134g water
6g fresh yeast*
3g sea salt
6g skim milk powder

* If you are using instant yeast, author recommended cutting it down to 1/3 of the quantity listed. Therefore, I only used 2g of instant yeast

Mix all the ingredients above together, and knead until soft. Cover the dough in cling wrap, and refrigerate to let it prove for 17 hours. Do use a bigger container to allow space for the dough to expand.

Dough
100g bread flour
6g espresso / instant coffee powder
3g sea salt
33g sugar
27g honey
27g milk
40g egg
3g fresh yeast (i wanted to use 1g of instant yeast; accidentally added 2g and bread was still ok)
33g unsalted butter


 Method

  • Mix all ingredients for dough together, except butter. Add in pre-ferment dough piece by piece.
  • Knead after each addition till soft and smooth. Add in butter, and knead until window-pane stage.
  • Put dough in a bowl. Cover with cling wrap and let proof for 25-30 mins. *As majority of the dough has been proofed once under low temperature, the proofing time is greatly reduced.
  • Divide the dough into 3 equal portions. Flatten each portion with your hands to drive the air out. Shape into rounds/ square. Cover with cling wrap and let it rest for 20 mins. 
  • Flatten each dough to drive out the air. Roll the dough up, and put into bread tin. Cover with cling wrap, and let it proof for 40-45 min or until the dough reaches 80% of the tin. Bake in a pre-heated oven at 170 to 180 degree celsius for 30-35 mins.

My Thoughts on 17 hour Pre-Fermentation Method:
- Thumbs up
* fast proofing time
* yields a high loaf
* bread still tastes moist on 3rd day

- Thumbs down
* time taken to incorporate the pre-fermented dough into the fresh dough
(even with the use of a machine, each piece took a while to be incorporated, and the whole process took me approx 30 mins; this does not include time taken for butter to be incorporated and dough to reach the window-pane stage). It's definitely not something you want to knead by hand!
* printing errors found on the recipe book
(one have to be very careful when reading the recipes; I found at least 2 printing errors in the book, thus it's better to double check the english translation with the chinese one)


Tangzhong
this I know - definitely the window-pane stage!

brown sugar and cinnamon topping for the bread

quite a small loaf
loves the topping!

texture of the bread

Recipe: (makes 1 small loaf; I would double the quantity next time)

Ingredients

(A) 190g bread flour
       44g caster sugar
       2g salt
       4g instant yeast

(B)  20g egg
       50g milk
       12g instant coffee powder
       60g tangzhong

(C)  20g unsalted butter

(D) toppings: 1tbsp brown sugar,  1/4 tsp cinnamon powder
      (optional; it's my little twist to the bread)

Method

  • Combine (A) together and make a well in the center. Add in (B), and mix till a dough forms.
  • If kneading by machine: Turn up the speed of the machine, and let it knead till gluten has developed. Add in the butter, and continue to let the machine work the dough till it reaches the windowpane stage. 
  • If kneading by hand: Turn the dough out onto a floured surface and knead till gluten has developed. Then knead in the butter till incorporated; further knead the dough till it's elastic and has reached the windowpane stage.
  • Round the dough up and place it into a greased bowl. Cover and let it proof till it's doubled in size (approx 40 mins).
  • On a lightly floured working surface, deflate and divide the dough into three equal portions. Round up, and cover them to let rest for 10 minutes.
  • Shaping the dough: Flatten each of the dough (remember to punch out the air!) and roll out into an oval / rectangular shape with a lightly floured rolling pin. Roll up again, like a swiss roll. Place into the bread tin for final proof. *The author uses a rectangle aluminium foil pan. She divided the dough into 12 pieces, proofing them as round shapes (very cute!)
  • Once the bread has doubled in size, add the toppings. Bake at 180℃ for 30 minutes or till the bread is golden brown and cooked through.
  • Remove from the oven and turn it out to cool on a wire rack. Unmold the bread onto wire rack to let it cool completely. Slice to serve, or store airtight once it's thoroughly cooled.

My Thoughts on Tangzhong :
- Thumbs up
* tangzhong is easy to prepare
* coffee flavor for this recipe is stronger (goes well with a spread of butter!)
* yields a soft bread

- Thumbs down
*  bread is still moist on 2nd day, but from 3rd day onwards, it gets drier


Above are my experiences using both types of methods. Each has its strengths, and both yield breads with slightly different texture (but still nice!). I will definitely be using them to churn out more home-made bread.

Here's ending off with my little creation, made using the coffee bread :) This cute sandwich helped brighten my day. Hope it does for you too!

Domokun Sandwich
Here's my newest creation playing with dough -  a Milk Tea Bread :)

can you see the little specks? they are actually tea leaves

It's my first time trying the "17 hour low temperature" pre-ferment dough method to make bread, and I'm thankful to Honey Bee Sweets for the inspiration. When I visited her blog, and saw pictures of the many breads she has made, I told myself I have to give this method a try.

I quickly did a search to see if the book "天然麵包香" can be found in the library. This is a very popular book, and many of them are on loan... but lucky me still managed to find it at the library near my home *beams brightly*

I can connect to the author of the book, 獨角仙 who also started as a home baker. That struck a chord in me, because like her, I'm just a person who likes home-baked food. I like her adventurous spirit too - after watching a show on TV, she actually got her friends (also home bakers) together to make their own stone oven.  I don't know how they managed to figure it out. It just sounded so cool to me!

It is said that by proofing the dough at a low temperature for 17 hours, you will be able to get a chewy, moist and yeasty bread that have a longer shelf life.

Recipe: (yields 2 loaf;  I half the amount to make 1 loaf)

Pre-ferment dough
464g bread flour
265g water
13g fresh yeast (i use instant yeast; turned out fine)
7g sea salt
13g skim milk powder

Mix all the ingredients above together, and knead until soft. Cover the dough in cling wrap, and refrigerate to let it prove for 17 hours. Do use a bigger container to allow space for the dough to expand.

Dough
199g bread flour
27g skim milk powder
7g sea salt
80g sugar
80g egg
80g milk tea concentrate (made by infusing 20g Earl Grey tea leaves in 133g hot milk for 15 mins)
7g fresh yeast (i use instant yeast)
66g unsalted butter
13g ground Earl Grey tea leaves (i use red tea)


Method
  • Mix all ingredients for dough together, except butter. Add in pre-ferment dough piece by piece.
  • Knead after each addition till soft and smooth. Add in butter, and knead until window-pane stage.
  • Put dough in a bowl. Cover with cling wrap and let proof for 25-30 mins. *As majority of the dough has been proofed once under low temperature, the proofing time is greatly reduced.
  • Divide the dough into 6 equal portions. Flatten each portion with your hands to drive the air out. Shape into rounds/ square. Cover with cling wrap and let it rest for 20 mins. 
  • Flatten each dough to drive out the air. Roll the dough up, and put into bread tin. Cover with cling wrap, and let it proof for 40-45 min or until the dough reaches 80% of the tin. Bake in a pre-heated oven at 170 to 180 degree celsius for 30-35 mins.


I seem to have overbaked mine (see how dark the top is). Therefore, my bread tasted a bit hard on its side. It also didn't have any 'tea' smell/taste. Haiz... I was hoping to get off with it by using red tea.. but there's probably no substitution for Earl Grey if I want the fragrance.

Anyway, I'm going to give this method another go...  *must perserve on, don't give up!*

Here's ending off with a quote by 獨角仙
"做面包不能太隨意,也不需要太執著,要視乎季節,溫度,食材等等因素,根据自己的經驗調節, 跟發酵中的面糰溝通 ﹣說穿了,正是用心烹調之道." - when making bread, one shouldn't take it too easy, or be too stubborn. Depending on the weather, temperature, and ingredients used, one should also use his experience to make adjustment, and communicate with the dough - simply put,  one needs to bake with his heart.

This, I think is the secret to making good loaves :)

Am sharing this on YeastSpotting
I've been on a bread-making frenzy lately. Probably because I have been experincing success, and I now want to experiment with different types of flavour  :)

my beautiful loaf
This is specially made for my dear, who love all things with cheese.

look at the filling - bursting with flavor!

Recipe: (from 65℃ 湯種面包)

Ingredients
(A)
171g bread flour
45g cake flour
22g caster sugar
2g salt
4.5g instant yeast

(B)
63g water
34g egg
54g tangzhong

11g unsalted butter

(Filling)
diced ham, smoked cheese (i use shredded cheddar), black pepper

(Garnish)
salad dressing/mayonnaise, pizza topping

Method
Preparing the bread tin:
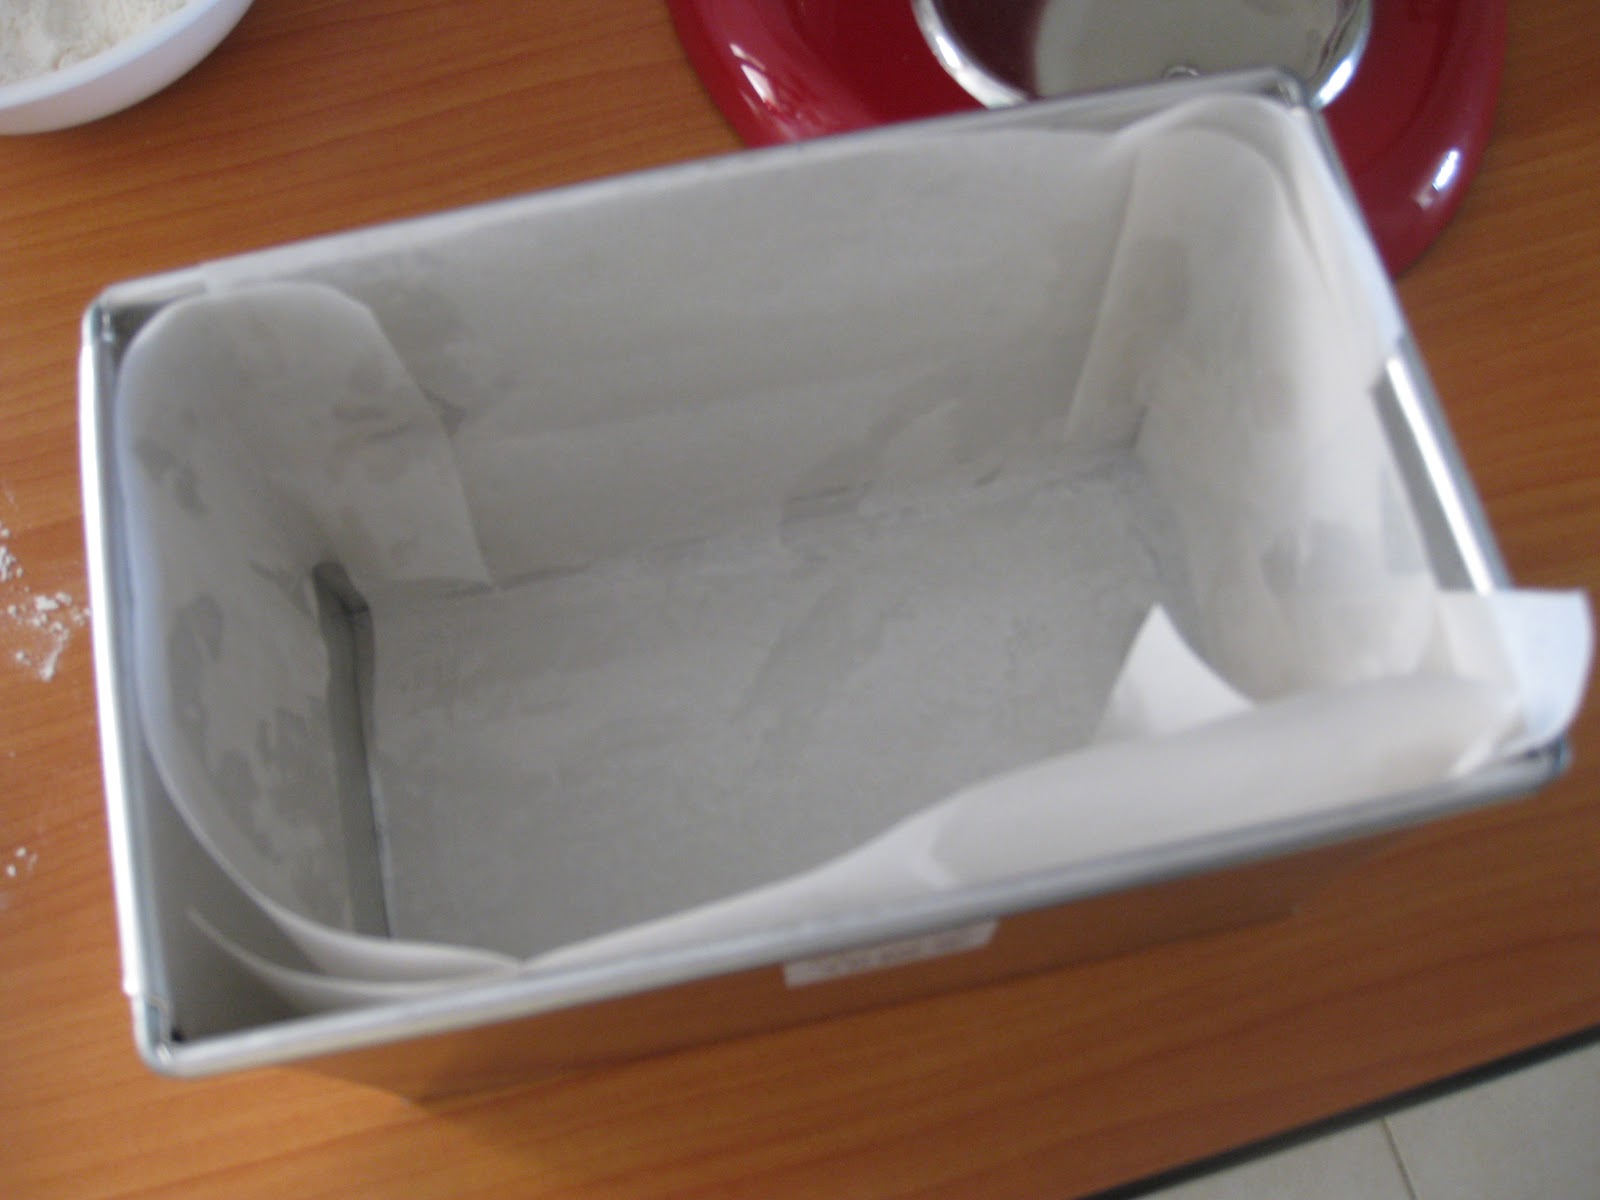
Tin must be lined with baking paper first. The author did not explain the rationale for so, but I guess it's to prevent the cheese from sticking to the pan when it has melted. It's easier to remove the bread from the tin this way :)

lining the tin with baking paper


Preparing the dough:


  • Combine (A) together and make a well in the center. Add in (B), and mix till a dough forms.
  • If kneading by machine: Turn up the speed of the machine, and let it knead till gluten has developed. Add in the butter, and continue to let the machine work the dough till it reaches the windowpane stage. 
  • If kneading by hand: Turn the dough out onto a floured surface and knead till gluten has developed. Then knead in the butter till incorporated; further knead the dough till it's elastic and has reached the windowpane stage.
  • Round the dough up and place it into a greased bowl. Cover and let it proof till it's doubled in size. (I took about 1 hour for this)
  • On a lightly floured working surface, deflate and divide the dough into three equal portions, with each weighing 120g (approximately). Round up and cover them to let rest for 15 minutes.
  • Shaping the dough: Flatten each of the dough (remember to punch out the air!) and roll out into an oval / rectangular shape with a lightly floured rolling pin. Put in the filling, and roll it up, like a swiss roll. Pinch ends to seal the dough tightly. Cut each dough into half and place into the bread tin for final proof.
  • Once the bread rises to about 70% full, top off with mayonnaise, and pizza topping.
  • Bake at 180℃ for 30 minutes or till the bread is golden brown and cooked through.
  • Remove from the oven and turn it out to cool on a wire rack. unmold the bread onto wire rack to let it cool completely. Slice to serve or store airtight once it's thoroughly cooled.
Tips:
  • The butter should not be added in too early, as it will affect the formation of gluten. 
  • Bread made using the tangzhong method is really very sticky. Don't worry, you are still on the right track. Just remember to flour your hands often. 
  • It is easier to peel off the baking paper from the bread after it has cooled down and the structure has set.
Bread-making is really fun! It's like playing with play-dough. You get your fingers all sticky and wet... but at the day of the day, you'll be surprised, and deeply satisfied with your creation, especially when you know there is no preservative or bread improver added to it. It's just wholesome goodness, fresh from your own kitchen.

Though I make my own bread now, I still missed my favourite bread from Creative Culinaire. They serve one of the best bread I've ever eaten, and their 3-coloured bread (made using spinach, beetroot and carrot) never fails to bring a smile to my face.

see how lovely the colours are
I'm definitely not able to re-create Creative Culinaire's signature bread. But hey... nothing's going to stop me from experimenting. As you may know, my previous attempt at making a carrot bread failed, so this time round, I decided to use a recipe that has yielded great results, and modified it to become the carrot bread.

yeah! successful this time
I had wanted to make it into a square loaf... but I went out of the house for brunch with friends, and by the time I got home, it ballooned up right to the brim. That's definitely a positive sign :)

it rose really high
beautiful sides

soft and light orange crumbs

I love the colour, and how soft the bread is! Wished I had made more as the bread was given to my relative who invited us to their house for dinner. Hmm... maybe it's time to get a 2nd loaf tin?


Carrot Bread (recipe modifed from here)

Ingredient
100g fresh milk
43g carrot juice*
35g egg (beat a whole egg first, before measuring out the quantity needed)
25g caster sugar
5g salt
250g bread flour
4g instant yeast
38g butter (unsalted)
25g shredded carrots (must be squeezed dry)

Method:

*Preparing the carrot juice:
I grated about 2 carrots. I then squeeze out the juice by hand, and measured out 43g to add to the bread. The carrot shreds are set aside to be added to the bread. <Advisable to wear an apron, for the juice is difficult to wash off if you get it onto your clothes >

Preparing the dough:
Recipe below is based on my experience using a KitchenAid mixer, but one can also knead the bread by hand. I used to make all my bread this way, before I got my 'bread making helper' :)
  • Place milk, carrot juice, egg, caster sugar, salt, bread flour and yeast into the mixing bowl. Turn the KA mixer to speed 1 to blend the ingredients together. You can use a dough hook to do this. 
  • Increase the speed to 2, and mix till the dough comes together, and gluten has developed. At this point, you can add in the butter. Beat on at speed 2. 
  • Once the butter has been mixed in with the dough, increase the speed to 4. Continue to let it beat for approx 20 mins, or when the dough reaches the window-pane stage.
  • Add in the shredded carrots, and mix on speed 1 to blend it into the dough.
  • Place the dough in an oiled bowl. Cover with cling wrap and and let it proof till doubled in size. This will take about 60 mins.
  • Remove dough and punch out the gas. Divide dough into 3 equal portions. Each dough is about 164-165 grams. Roll and shape into balls. Let the doughs rest and relax for 15 mins. *Dividing the dough into equal portions will ensure all 3 parts can rise to the same height during the 2nd proof
  • On a lightly floured surface, flatten the round dough and roll it out. The rolled dough will still be circular in shape. Take the dough from the top and fold it towards the centre. Pinch down the seams. Take the dough from the bottom and fold it towards the centre. Pinch down the seams. You would have a longish dough now. 
  • Flip over the dough, so that the side with the seams face the floured table.  Roll out into a longish shape. Then roll up the dough swiss-roll style. Do the same for the two remaining doughs.
  • Place doughs in lightly greased bread tin/pan. Let the doughs proof for the second time, until it fills up 80% of the tin/pan. 
  • Bake at pre-heated oven at 180deg C for 50 to 60mins. The bread is done when the sides are evenly browned.
  • Unmould the bread immediately when removed from the oven. Let cool completely before slicing.


I've been thinking about making a carrot bread recently.

I can't quite explain the fascination behind it, but I like the idea it's healthy and natural :)

As I was lazy to bring out my extractor, I got the carrot juice from a fruit juice stall near my home. I didn't use up all the juice, and the remaining juice was shared between myself and my husband. I didn't know carrot juice, without ice, can taste so good!

However, things in the kitchen didn't turn out quite well for me.

I spilled some of the juice onto my shirt, and I can't get the stains off now. My spatula (which I used to scrap down the dough) has also changed from white to yellow. The carrot is such a powerful coloring agent.

I was a bit worried when I notice how sticky the dough is, even after 20 mins of mixing on the machine. Did this happen because I didn't follow the recipe? The recipe called for 100ml water and 50ml of carrot juice, but I changed it to 150ml of carrot juice.

At the end of 30 mins on the machine, it was still very sticky. I decided to stop the machine and let the dough go for its first proof. Deep in my heart, I was hoping the dough would be less sticky after it has doubled it's volume.

My hopes were shattered when I turned the dough out onto the floured table.. Haiz... it's still sticky! I had wanted to make a square loaf, but given it's texture, I changed to using a round tin. Anyway, this is a shape I've never done before for bread... decided to give it a try bah. This is how it looks like.

before it's baked
after it's baked
height of the bread

doesn't it look like a flower?
The color is very pretty right? But taste wise... I find it quite dry.  It lacks softness, compared to the Milk Loaf  I made previously. I won't be putting up the recipe, till I found a way to make it softer.


Nonetheless, I'm still going to submit this for Natural Colour Bakes organized by Hankerie.

I believe there are others who may have similar experience as me. Hope this can encourage all to keep on trying! 讓我們一起加油!