I love mushrooms, and when I saw this recipe from Piggy's Cooking Journal, I have to give it a try!

The original recipe called for mirin, but after trying to get some from Shop N Save, followed by a walk to NTUC, I just couldn't find it. I even tried putting my hands all the way into the back of the display shell, and still... there wasn't any. Arghh... why didn't they replenish their stock?

Anyway, I went ahead to cook the dish.. and here's my own version of Mushroom Rice, using whatever ingredients I have on hand :)


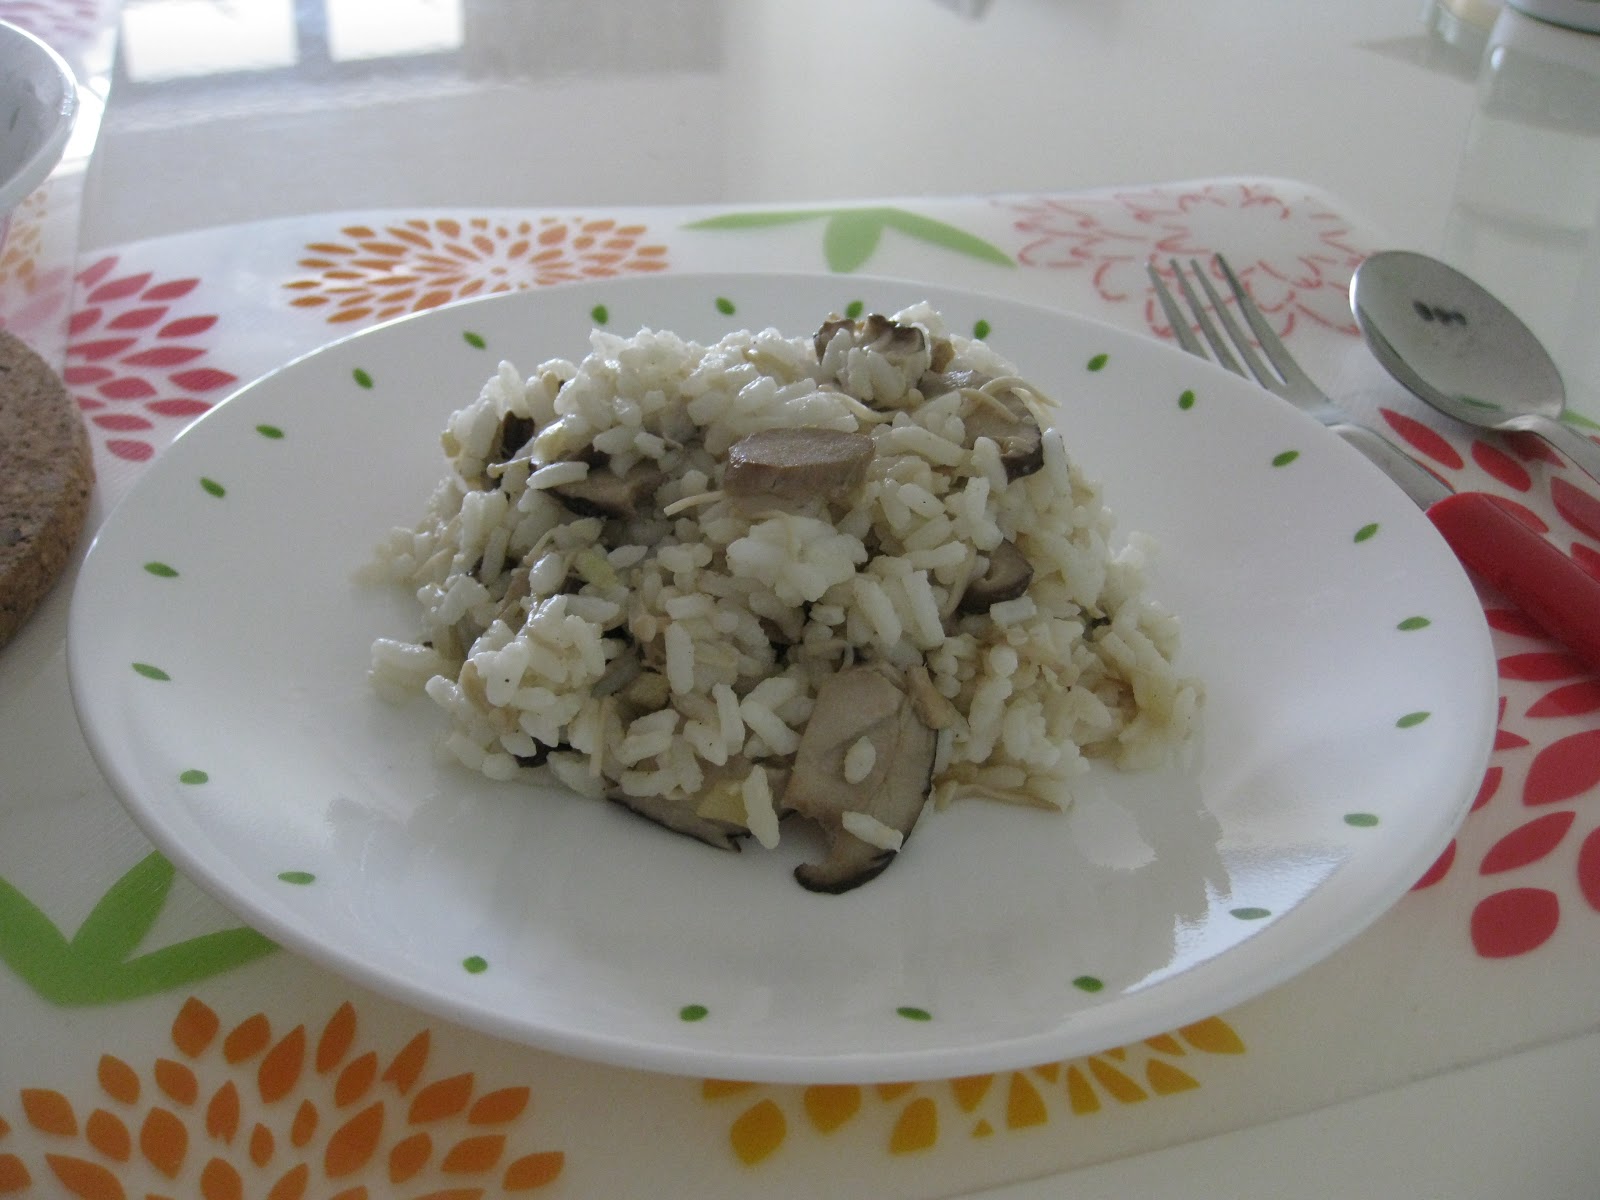

Ingredients
Cooked rice for 2
250g of mushrooms (i used enoki and shitake mushroom), cut into small pieces
20g butter
5 cloves of garlic, diced

Seasoning
1 tbsp of creme fraiche (can replace with sour cream/ cooking cream)
2 tbsp of white cooking wine

Method
  • Heat up the wok / frying pan. Add in butter. Stir-fry the garlic till fragrant.
  • Add in all the mushrooms, and cook till soft. *It may appear a bit dry, but as the mushroom cooks, it will release water.
  • Add in the white cooking wine. Let it cook for 30 seconds, before adding in the creme fraiche. Mix everything together.
  • Lastly, turn off the heat, and add in the cooked rice. Mix well, and serve!
The rice has a earthly-mushroomly taste, which dear and I love. I also like adding wine to mushrooms, as it will give the dish a sweet aroma.

The simple meal for two, was paired with watercress soup. Very healthy too!
Yippie! I went for an outing today. I think I'm a child sometimes... getting so excited over going out. Especially now that I stay home on most days, I look forward to going out. Haha... and my dear knows that!

We arranged to meet Jieling for brunch, and to take photos at the museum. She brought over some plants for us.


Brunch was at Olio Dome, situated at the Singapore Art Musuem. I like the breakfast menu a lot, as I think it's value for money. The quantity was filling - they served 2 slices of multi-grain bread (toasted), had a large piece of roasted tomato, 3 chipolata sausages (can you believe how generous they are?), and the scrambled egg tasted delicious (with a hint of milk/butter, neither too wet nor dry). The best thing was this only costed $8.90

We had wanted to visit the SAM 8Q musuem, but didn't realize the exhibits had ended. In the end, dear suggested going to Portsdown Road for some photo-taking. The place has a lot of colonial-looking bungalows. The people are real rich, and some of them have their own swimming pools. 

We ended our outing by visiting Kki, a cafe located at Ann Siang Hill. It's a cosy little place run by a husband and wife team. I heard that the baker, whom is also the owner self-taught himself to bake.
warm welcome
 
cake display area
there's a retro store, the little drom room co-sharing the space

Jieling and I had been wanting to try his cakes, but it was closed the last time we visited. We had better luck this time, and this was what we ordered.
 
champagne mousse with wild strawberry centre

dark chocolate mousse with raspberry centre - yummy!

some hazelnut cake - this has more crunch
I especially like the dark chocolate mousse with raspberry centre. It's not too sweet. The mousse is very light, and the raspberry centre, with a bit of tartness greatly compliments the chocolate. I have a chance to meet the baker too. I was looking at a photo of him on the wall, and suddenly when I turned my eyes into the kitchen, he was there. He's quite friendly, and gave a smile when he saw me!

I enjoyed myself a lot today! The next outing would be my birthday celebration! Counting down now...
Time flies, and unknowingly, I've entered my 4th baking session with the youths.

I'm getting more comfortable - knowing what to expect, re-thinking through my objectives. I've also started using videos, and will re-write the baking instructions so that the youths can easily understand and follow the steps.

Those youths whom I had difficulty engaging never came back. Come to think of it... that's not a bad thing, because I can then give my fullest attention to the students who are interested to learn. Perhaps like what KF says, it's a great luxury to have such a small number of youths to work with.

It was really heart-warming to know that the youths noticed my effort. One of them commented that nobody presents recipe in that manner, and I must have done something to it. Exactly! 

As a F&N student, he told me he has never learnt to crack open an egg. I was rolling my eyes in disbelief. How is that possible? He told me he has always asked for the teachers' help, and being a charming student, I believe they would have given in to his request. I told him I'm not going to do that for him, and took the chance to challenge him to overcome the mental barrier that he can't do it. He has promised me to give it a try in the next session. I have faith that he can do it!

After each session, it was helpful to affirm the students, and to share observations of their efforts and contributions. I was also sharing with them on my own learnings, and this led the girl to open up and share one thing she was proud of, which she managed to accomplish in the session.

This is a shift for me, because she would usually have nothing to say.

We did apple crumble muffins, and KF offered us tea to go along with the muffins.

Maybe I should bring along my own teabags too? It would be nice to de-brief over tea.


Here's the recipe:
(adapted from The Great Bake Sale Cookbook - 75 sure-fire fund-raising favorites)


Ingredients - yields about 12 muffins
(A) 63g brown sugar
      45g butter, cut into small pieces (must be cold)
      47g plain flour
      1/4 tsp ground cinnamon (optional)

(B) 280g plain flour
     1/2 tsp ground cinnamon
     1/2 tsp salt
     95g caster sugar
     1/2 tsp baking soda
     2 tsp baking powder

(C) 1 egg
      240ml buttermilk*
      100g butter, melted
   
      280g plain flour
      1 apple, peeled and finely diced

*
To make buttermilk: add 1 tbsp of vinegar to 1 cup of milk (240ml) , and let stand for 5 mins.

Method
  • Pre-heat oven to 200 deg C.
  • Prepare the crumble topping: Using your fingertips, mix all the ingredients from (A) together. Mix until it resembles coarse crumbs. Set aside in fridge till ready to use.
  • In a medium bowl, stir together the ingredients in (B).
  • In another bowl, using a fork, mix the buttermilk, egg and melted butter till well-blended. Stir in the apples. 
  • Add egg mixture into flour mixture, and mix everything together. *Impt: do not overmix. Once the flour are all mixed i.e. when you don’t see any white lumps, it’s done.
  • Spoon batter into muffin cups, and fill till 80% full. Add crumble topping.
  • Bake in oven for 25 mins, or when toothpick inserted into the centre of muffin comes out clean.

Notes
  • The muffin tasted very light and fluffy - a refreshing change from the muffins sold outside which is usually denser. 
  • The muffin itself was a bit bland, but the crumble topping complimented it well, and give it sweetness. 
  • I would still prefer something sweeter. Next time, I would increase the sugar by 10g, add in some raisins and walnuts to give the flavour more depth. Would also replace the red apple with green apple.
There are some things in the house I can't leave without... and one of it is my Citromatic.

When I was young, whenever there were oranges to be cleared,  my mum would bring out the  glass juicer, and manually squeeze the oranges. It was tiring when she has to make orange juice for all 3 children (cos we would all want some). It's after I receive this gift that I fell in love with making and drinking orange juice.

Here's introducing to you my favourite gadget:
my citrus juicer
making my own orange juice
top view
see how it squeezes the orange dry
It's really handy to have if you want fresh orange juice regularly. This definitely beat store-bought juices, in terms of its taste and nutritional value. Sometimes, I would add in a grapefruit as well.

Its limitation is that it is used for citrus fruits only. However, unlike a fruit extractor, it's easy to wash, and doesn't take up much space. I love my citromatic, and I believe you would too, if given the opportunity to own one.

It's through making juices, and from the fruit seller I learnt about the different types of oranges. The lady was sharing that Valencia oranges, which have a higher liquid content is more suitable for juicing. Navel oranges are more suitable to be consumed directly as fruits.

That's something new for me, and I also found that Valencia are generally sweeter... No more sour orange juice for me, now that I know the type of oranges to choose :)
Have you ever wonder what savoury muffins taste like? Hmm... I was curious, and with friends coming over for tea, it was the chance for me to try something different!

As you can see, I'm not one to try something safe - to repeat the tried and tested recipe. Dear says I need to hone my skills, and to develop consistency in my baking, which means to bake the same thing till I master it. Haiz.. but that would bore me, and he would have to eat the same thing over again. He'll probably be sick of it by then, even if it tasted nice. So I chose to follow my heart :)

Besides the savoury muffin, I also prepared something sweet - cheesecake. Argh... that didn't work out well. I forgot to protect the tin with aluminium foil (when putting in the water bath), and the cake turned out all soggy. Nevertheless, my friends are very encouraging, and they tried (and almost finished) both dishes I prepared for them :)

 
supposed to be featherlight, but turned out dense


the colour is nice, right?
this tasted better!
with a cute little dome

I'll need to work on the cheesecake again, so here's sharing with you the recipe for the muffins first.

Recipe: (taken from 孟老師的100道小蛋糕)- makes about 12 muffins

Ingredients
120g potatoes (with skin removed)
1/2 tsp salt
1 tsp black pepper
20g caster sugar
1 egg
50g sunflower oil
40g milk
75g cake flour
1/2 tsp baking powder
1/8 tsp baking soda
1 slice of cheese (i used Kraft cheese)

Method
  • Peel and dice the potatoes. Steam/boil it until cooked and soft. Mash up the potatotes, and season with salt and pepper. Set aside.
  • In a medium bowl, combine the egg, oil and caster sugar together, using a whisk.
  • Add in milk, followed by the mashed potatoes. Mix till everything is well combined.
  • Sieve the cake flour, baking powder and baking soda together. Add it to the mashed potatoes mixture, and switch to a spatula to gently mix everything in.
  • Cut the cheese into small slices, and add to the batter. Mix well.
  • Scoop batter into muffin cups. Bake at 180 degree celsius for 20-25 mins.

This muffin tastes really soft, and I like how the taste of the potatoes blend with the cheese and flour.  It will make a wonderful picnic snack, or a light munchie for lunch. You have to give it a try to understand what I mean.

By the way, the brown parts, as seen on the muffin is the cheese. I'm not sure why 孟老師's cake doesn't have the brown parts, when I compare mine to the picture in the book. If you have the answer, please help to enlighten me :) Nonetheless, the brown part also tasted good!