Hands up, if like me, you love the month of December!

This is my favourite month of the year, because there is Christmas. This means lots of food on the dining table, presents, fairy lights and the smell of fresh fir in the house.

I have always chosen to buy a real tree, which I get from Ikea. It is a magical feeling to wake up each morning, smelling the earthly aroma of the fir.

Also, what's Christmas without a log cake, so here's mine:


I even sneaked in blueberries for some crunch.


Recipe

Chocolate Sponge Cake
Recipe from Creative Culinaire. I won't share the recipe, as it is taught to the students in their baking class. You can easily find other recipes online, or try this sponge cake recipe here

Custard Filling (from 孟老師的美味蛋糕卷)
100g unsalted butter
2 egg yolks
40g caster sugar
20g plain flour
200g fresh milk
1/4 tsp vanilla essence

METHOD
Place the butter in a bowl and let it come to room temperature. Set aside.

In another bowl, beat the egg yolks and sugar till evenly mixed. Add in the flour.
Continue beating, and add in the milk. Add in the vanilla essence.

Using the double-boil method, place the bowl over a pot of boiling water.
Beat the mixture till you see streaks forming.
*It takes patience and arm strength to keep stirring the mixture. The mixture will bubble and thicken after a few mins. Continue beating, and only stop when you see the streaks forming.
Remove from heat. Cool the mixture over a bowl of iced water.

Beat the butter till soft and fluffy.
*As the butter is quite soft, I simply stirred with a wooden spoon.
Add butter to the cooled mixture. Mix well and you have custard.

Custard makes a good filling as it is smooth and creamy, with a hint of vanilla.

Ganache (adapted from Nigella Lawson)
100g dark chocolate - I used Callebaut 70%
142g icing sugar
127g unsalted butter, softened

METHOD
Melt the chocolate, over a pan of simmering water or the microwave.

Put the icing sugar in a processor and blitz to remove lumps.
Add the butter and melted chocolate. Pulse again to make a smooth icing.

If you don't have a food processor, you can also do this by hand.
Remember to sieve the sugar before mixing with the butter.

To assemble the log cake, cut two slits on the sponge at the edge that is nearer to you.
This makes it easier to roll the cake.
Spread custard over the chocolate sponge. Roll up the cake and let chill in the fridge for at least 60mins.

Remove cake from fridge. Cut off both ends at a gentle angle, and place them on the cake board to resemble a branch coming off a big log. Spread with ganache and use a fork to create the swirl lines.


Waffles conjure up images of a lazy afternoon well-spent at a cafe... where I take my own sweet time to eat and watch the world go round. It is also the perfect brunch food, enjoyed with sweet toppings (like an ice-cream) or savoury ones (think bacon and cheese). It is so versatile, and the deep pockets where puddles of maple syrup gather always beckon out to me.

What's not to love about them? Especially when there are so instagram-worthy!


Buttermilk Waffles Recipe
Adapted from Waffles (Sweet, Savory, Simple) by Dawn Yanagihara

250g plain flour
2 1/2 tbsp sugar
1 3/4 tsp baking powder
3/4 tsp sea salt
1/4 tsp baking soda
2 large eggs
480ml buttermilk
85g unsalted butter, melted and cooled slightly

METHOD:

Preheat the waffle machine.

Whisk together the flour, sugar, baking powder, salt and baking soda until well combined. In a medium bowl, whisk the eggs and buttermilk together. Gradually whisk in the melted butter.

Pour the wet ingredients into the dry ingredients and whisk gently until the batter is evenly moistened. Pour the batter into the centre of the waffle iron.

Use a rubber spatula to distribute it evenly, making sure the waffle iron is fully covered with batter. Cook for 6 mins (subjected to the heat distribution of your waffle machine.. mine took about this time to reach a deep golden brown).

Cool the waffles on a wire rack. Trim the edges with a scissor.


Have fun stacking it into a tower and drizzle with your favourite toppings! Let's go waffling....


In the Chinese culture, roasted pork belly (also known as Sio Bak) are served during special occasions, celebrations or as an offering to the deities to request for blessing.  While it used to be very expensive, you can easily buy good roasted pork from the stalls and restaurants now. It is equally fuss-free to make some in your home too.

Homemade roasted pork belly is addictive. Eating it is like having a myriad of flavours and texture exploding in your mouth. You will first bite into the crispy and salty skin, then the melty fats, before tasting the moist and soft meat. My dieting plans are put on hold whenever this dish is being served. After all, a few pieces of these tasty meat won't hurt right?

Homemade also means that you can control the amount of salt used. I often find those sold outside a tad too salty.

Here, I am using a recipe from Noobcook. Using the method below, I did find the following to be useful

- Importance of poking the soft parts of the skin every 30 mins 
  This helps to create the blistering effect and for the skin to crackle.

- Placing the meat on the higher rack closer to the heating coil. 
  I find that this reduces the cooking time. If baked too long, the top may be crispy but the skin will be
  too hard and thick. Not very suitable for the elderly if you are planning to serve it to them.

It really is quite easy to make with an oven, and a dish that will impress your guests.


Recipe

420g pork belly

(A) Meat Marinade
1/4 tsp white pepper powder
1/4 tbsp five-spice powder
1 tsp sea salt

(B) Skin Marinade
1 tsp sea salt


METHOD:

1. Using a knife or satay stick, evenly poke holes on the surface of the skin (but not cutting into the surface of the meat). This can be difficult, but try your best. It will be easier to poke holes on the skin using the bamboo skewer after it is roasted in the oven.

2. Rub (A) onto the meat. Be careful not to get the marinade onto the skin. If it does, remove using a paper towel. 

3. Rub (B) onto the skin. Place the pork belly on a plate, and leave it uncovered in the fridge for a few hours or overnight. 

4. When ready to roast, place the pork on a baking pan. The baking pan is placed on a roasting pan filled with water. Bake the pork belly in the preheated oven at 220C for 30 mins. Reduce the heat to 200C after 30 mins, and poke the skin which is still soft, with a bamboo skewer. Repeat this process every 30mins.

5. Continue baking the pork belly for another 60 mins or until the skin is roasted to crispy perfection.

6. Let the meat cool for 15 mins before cutting into smaller pieces.
image source: move nourish believe
Hi, I am back.

I am feeling guilty for I have been missing for a long while, leaving this space empty while I focus on my other commitments.

I guess my priority changes with greater work responsibilities, and wanting to take better care of self. Weekends are dedicated to resting and I just want to go cafe-hopping, eat cakes and catch up on sleep. Furthermore,  I do a lot of writing at work. Blogging then took a backseat as I didn't want to spend more time in front of the computer after work.

The happy thing is I was (am) still baking. Having less time calls for the mind to be creative and selective. I was still making loaf cakes, one-bowl cookie mixes and the occasionally bread.


Think of it as seasons, the weather changes, and so can a person's priority. I began missing this space. I am reminded of the baking buddies I have made through this platform, and how generous people are in sharing their baking and cooking experiences.

With a renewed energy to write again, I am sweeping off the dust from the blog. I even redesigned a new template, to symbolise a new start. There is only one intent - to document and share my adventures in the kitchen.

I would love to have you join me in this journey too! Here we go...


Lately, I have fallen in love with reading interior design and DIY blogs. Somehow the idea of being able to create something appeals to me. Perhaps that's why I love to bake!

I have been spending the last two weekends re-arranging my house, and taken on mini projects to inspire and rejuvenate self. Seeing the pieces come together is fun!

Feeling a bit guilty I keep procrastinating, I finally baked this - a Japanese Cheesecake.


Compared to previous recipes I had tried, this used whipping cream and a lot more cream cheese. Looking at the ingredient list, I thought how decadent it is! It proved to be true. My hubby even asked for a second helping.


Texture wise, it tastes rich, yet fluffy, and melts in your mouth. However, it is important to ensure that the baking tin is lined with sufficient aluminium foil to prevent water from seeping into the tine during baking.


On another note, I had some frozen egg whites in my fridge. Sometimes there are left-overs, as certain recipes might only require egg yolks. As I did not want to waste the egg whites, I would pour them into ice cube boxes. Just nice, one square for one egg white. The other way could be done for egg yolks too. So when I need my eggs, I just let it de-frost and come to room temperature. The results are good! My de-frosted egg whites could still be beaten up to stiff peaks.

Recipe adapted from Just One Cookbook

Ingredients:
400g cream cheese
60g sugar
60g unsalted butter
2 large egg yolks
200ml whipping cream0
1 tsp lemon juice (optional)
1 tbsp rum (optional)
80g plain flour

For the meringue
6 egg whites
100g sugar

Instructions:
Preparation note - The cream cheese, unsalted butter, eggs and whipping cream should be brought to room temperature before use.

1. Grease the bottom and sides of a 9 inch spring-form plan and line with parchment paper. Wrap the base of the pan with aluminium foil to prevent seepage.

2. Preheat the oven to 160C. Start boiling a kettle of hot water (for the water bath later).

3. In bowl of the electric mixer, beat the cream cheese and sugar on medium high speed until smooth. Add the butter and mix until incorporated.

4. Add the egg yolks, one at a time. Mix well. Add in the whipping cream and mix well.

5. Add in the lemon juice / rum and mix until the batter is smooth. At this time, the batter would appear runny.

6. Shift the plain flour and add to the batter. The batter would start to thicken up.

7. To prepare the meringue, beat the egg whites until stiff peaks form. Using the bowl of the electric mixer, begin by whipping the egg whites on medium speed (speed 4 for KA) until foamy. Gradually add in the sugar as the mixer runs. Once all the sugar has been added, continue to let the mixer whip the meringue until it is glossy, and the volume has doubled in size.

8. Add 1/3 of the meringue to the cream cheese batter. Mix well to loosen up the batter. Then add the remaining meringue to the batter. Fold it in until incoporated.

9. Pour the batter into the cake pan, and drop the pan slightly onto the table to remove any air bubbles.

10. Place the cake pan into a tray / roasting pan filled with hot water. This creates a water bath. Place the pan in the middle middle rack of the oven.

11. Bake at 160C for 60 mins until light golden brown. Then reduce the temperature to 150C and bake for another 30 mins. It is ready when a wooden skewer inserted into the centre of the cake comes out clean.

12. Let it cool in the oven, with the door slightly ajar before removing it from the roasting pan.


* Just a note for self: To bake the cake longer (for about 30 mins) and to tent the cake, if the skewer comes out with moist crumb after 1.5 hours. I suspect my cake is a little under-baked this time.
This year, I decided to be adventurous, and to try making my own pineapple tarts. There were many steps involved, and I was already tired at the first task, which was to finish rolling all the pineapple jam. It took me about an hour or so. But with a rest in-between the rolling, and a determined spirit, I pressed on! Fortunately, my sister also came over to help me.

I think we were proud of ourselves when we finished baking the pineapple tarts. Look at them - pretty and round. At one bite, you can taste that it's home-made. The taste was unlike those in the stores, but equally nice!


There was one obstacle though. We had baked the pineapple jam with the tart shell, and it was too dry by the time we took them out of the oven. In the end, we baked the tart shell first and added the jam halfway through the baking time.


I chose the following recipe as I wanted a buttery and melt-in-the-mouth kind! It's good, and reminded me of shortbread.


Recipe:
From The Little Teochew


For the Pineapple Jam
The jam was bought from Poon Huat, and I rolled it into balls weighing 8g. Recommended to roll it the day before. The jam was the drier kind, and I found that wetting your palm with water helped to smooth out the edges.

For the Pastry

- 50g corn flour
- 1/4 tsp salt
- 6 tbsp icing sugar
- 280g cold, unsalted butter (cut into small pieces)
- 3 egg yolks, beaten
- 3 tbsp cold water (or iced water)
- 1/2 tsp cognac or pure vanilla extract
- For glaze, mix 1 egg yolk + 1 tbsp water

Method:
1. Sift the plain flour, corn flour, icing sugar and salt together. Mix well to combine.

2. Place the cold butter into the flour. Using your fingertips, rub the butter into the flour till it resembles coarse bread crumb. 

3. Beat together egg yolks, cold water and cognac (or vanilla extract). Add it into the butter-flour mixture. Using your finger tips, gently coax all the crumbs into one large dough ball. Do not knead. As long as all the crumbs come together, stop. Chill in the fridge for about 10mins, covered.

4. Roll out to desired thickness. Cut out dough using cutter. Arrange neatly onto baking tray, with at least 1.5cm apart.  *I found this video from Youtube helpful, as it showed me how to use the cutter to achieve the classic spiral shape we always see on the cookie.

5. Once you have arranged the tart shell on your tray, glaze them (the entire surface, not just the rims).

6. Place the pre-rolled pineapple jam balls onto the centre of each tart shell.  *As I used a drier jam, I baked the tart shell first for 10 mins, added the pineapple jam, and placed back into the oven to bake for another 10 mins.

7. Bake at 160°C for 20 minutes, turning the tray halfway through baking.

I was reading through some blogs, and a statement connected well with me - With time as an important commodity, we should post awesome recipes we wanted to keep, and memories we wanted to look back at.

This is one such recipe!


Perhaps in part, this recipe was mofidied from Jamie Oliver. He's one of my favourite celebrity chesf, and I totally enjoyed watching his Food Revolution. In the show, he was trying to encourage people to stop feeding ourselves with processed food, and to start cooking healthier meals.

I still remembered a particular episode where fried potatoes (aka french fries) are considered a vegetable in the school canteen. Shouldn't our vegetables be green in colour? I was shocked! While Jamie had also cooked up a main dish and vegetables to offer students another lunch option, many still opted for the western food with french fries.

Where possible, I try to avoid processed food now. Thus I decided to make this salmon potatoes patty, which is refered as fish cakes in the western context. I know what you are thinking... fish cakes? Those that we eat in the morning as breakfast with fried bee hoon? Haha... No!

Mashing everything up

Shaped into circles with the help of my cutter

Pan-fried and tasting good

Recipe
Modified from here

Ingredients:
600g potatoes
300g salmon
1 egg 
fresh parsley, chopped (optional)
1 tbsp of plain flour, for dusting

Method:
Rub salmon with salt and pepper. Drizzle with olive oil and bake in the oven at 180C for 15-20 mins till fully cooked.

On the other hand, peel the potatoes, and boil them in a large pot of salted water. When cooked, drain the water and let steam dry for a minute before mashing them up.

When the potatoes are cooled, put it into a bowl and flake the salmon (skin removed) into it with 1 tbsp of flour. Add the egg, chopped parsley, pinch of salt and pepper. Mix everything well.

Dust a plate with flour. Shape the fish cake using a round cutter or by hand. Pop into the fridge for an hour before cooking - this would help the patty to firm up. Pan fry on medium heat till each side is brown.
While I love sweet food, my husband loves savoury stuff. I remembered we used to go for movie dates and he would ask if I want to share some savoury popcorns with him. I would look at him sweetly and ask "Please dear, can we have sweet popcorns?" And he would willingly go and get the sweet ones! Haha.. That's how sweet my husband can be.

Once in a while, I would cook up something savoury for him. Thus today's parmesan cheese and bacon muffins.

Fresh from the oven!


You would need to cook the bacon and onions first. A tad bit troublesome, but worth the effort as the whole kitchen was filled with a lovely smell when the muffins were cooking.

I recently acquired a kitty cloth, and couldn't resist putting it into the photos for they are simply kawaii!

Serving my muffins with a cute table cloth

While I associate sweet muffins with dessert and teabreaks, the savoury ones can be substitued for a light lunch or brought along for picnics. This is definitely a great base for savoury muffins, and I can imagine myself making different variations by adding mushrooms, or canned corns etc.


Recipe (serves 12 to 15 muffins)
Adapted from Bestrecipes

Ingredients:
350g self-raising flour
salt and pepper
125g melted butter, cooled
250ml milk (1 cup)
2 eggs
2 tsp chopped chives
100g parmesan cheese
100g diced bacon
1 small diced onion
1/2 small red capscium, diced

Method:
  • Preheat oven to 200C.
  • Fry onion, bacon and capscium till soft.
  • Sift flour into a bowl. Add parmesan cheese, salt and pepper. *I only added a pinch of salt as both the bacon and parmesan is salty. But if you are a savoury person, you could increase the salt to 1/4 tsp.
  • Whisk eggs, milk and chives together. 
  • Make a well in the flour. Pour in the milk, and melted butter, and fold till well combined.
  • Fold in the bacon and onion mixture.
  • Spoon into a muffin tray. Top with extra parmesan and bake for 20-25 mins till the top turns golden in colour.
Continuing with the love for pink and dreamy stuffs (actually I was more of wanting to use up my strawberry puree), I was excited to find this recipe from Little Accidents in the Kitchen. And I thought, a little tinge of pink in the pancake would be so cute! Do check out her website to see how pretty the colour looked.


As for the one I cooked, I used too little puree during the first time. Thus, I doubled the strawberry puree on the second attempt.


Hmm.. Much better looking now.

This is a simple batter to put together, and the texture is pretty fluffy. But I do have to take note not to overcook the sides. What I did was to look out for the bubbles (which tells me it's nicely brown on the other side).


Flip it over and cook for about another minute of so (depending on the size of your pancake and the stove temperature). The first pancake I cooked would usually be "chao da" - burnt, but after the sacrifice of the first pancake, it helps me to gauge the cooking time better =)


Recipe (source: Little Accidents in the Kitchen)
Makes 9 pancakes


Ingredients:
4 tbsp of strawberry puree
1 egg
1 cup milk
1/2 tsp vanilla extract
3 tbsp granulated sugar
1/4 tsp salt
1 tsp baking soda
228g plain flour

Method:
1. Mix all the dry ingredients together. Add the wet ingredients and stir till everything is well combined.

2. Grease a skillet with oil, and heat on medium high.

3. Pour 1/3 cup of batter onto the skillet and cook for about 1-2 minutes, until the bubbles that appear on the surface pop.

4. Flip and cook for another 1 minutes till golden brown on both sides.

5. Serve hot with honey.


As I grew old each year, I started looking back at what I've missed out as a kid, and wanted to fulfill these dreams.

Therefore for my birthday in Sep this year, I decided to organize a party with a retro theme.

Brought out all my vintage toys to display

Luckily my friends were sporting enough, and came dressed in polka dots. As for my husband, he tried to look like a nerd with a pair of black rimmed glasses, and short pants he purposedly pulled up very high. He looked hilariously cute!

I had to admit a lot of inspirations came from the food I ate.. and having tasted a very nice buttercream cake from a local cafe, I decided on making a strawberry swiss meringue buttercream cake.


I loved the texture of meringue.. creamy, buttery, and not overly sweet. The best part was that, unlike whipped cream, the meringue held its shape well, and did not melt easily. But making the meringue was tricky. There's one point where it looked like scrambled egg. I would have panicked if I had not read these helpful steps on making swiss meringue from Sweetapolita.  My take-away: in the event the meringue did not reach the desired consistency, one had to continue whipping it to get the smooth satiny texture. Oh yes, and cutting the butter into smaller pieces would help.

To pair the sweet pink color of the meringue, it had to be a dark chocolate cake. Visually pleasing to the eyes, and a match made in heaven.


Recipe (from Sweetapolita)
Yields a three layer 7 inch cake

Ingredients
For the cake:
180g plain flour
275g sugar
60g cocoa powder
1 1/4 tsp (6g) baking soda
1 1/4 tsp (6g) baking powder
1 tsp (5g) salt
140ml buttermilk
130ml hot brewed coffee
75ml vegetable oil
2 eggs, lightly beaten
1 tbsp vanilla extract

For the strawberry swiss meringue buttercream:
5 egg whites
250g sugar
340g butter, cut into small cubes, and cooled (not cold)
2 tsp vanilla extract
1/4 cup (59ml) strawberry puree
pinch of salt
few drops of pink food coloring


Instructions
  • For the cake:
  • Preheat oven to 180C. Prepare three 7-inch round cake pans (with parchment papers/ floured)
  • Sift all dry ingredients into the mixer bowl.  Add the remanining ingredients, and mix for 2 mins on medium speed, using the paddle attachment on mixer. 
  • Pour into prepared pans. Remember to weigh batter and divide equally into 3 for even layers. Batter will be liquidy.
  • Bake for 20 mins and rotate pans in oven.Bake for another 10 mins, and it's done when skewer comes out clean. Try not to overbake.
  • Cool on wire racks for 20 mins.

For the strawberry swiss meringue buttercream:
  • Add egg whites and sugar into the mixer bowl, and simmer over a pot of water (not boiling), whisking constantly, until the sugar had completely dissolved and the egg whites are warm. If you have a thermometer, to reach 160F. If not, use your fingers to feel that the sugar had completely dissolved, and there's no grainy feeling in the mixture.
  • With whisk attached to the mixer, whisk the mixture till it's thick and glossy.
  • Switch over to paddle attachment, and with mixer on low speed, add butter cubes, one at a time until incorporated. *If mixture cuddles, to keep mixing and it would come back to smooth. Don't increase the speed. *If mixture is too runny, refrigerate for 15 mins, and continue mixing with paddle attachment until it comes together.
  • Add vanilla and salt and continue to beat at low speed till well combined.
  • Add strawberry puree to taste and pink coloring. *I used Wilton gel color.

Assembling the cake:
  • Spread buttercream on each layer of the cake, and stack the layers up. Spread a thin layer of buttercream to the sides to crumbcoat the cake. Chill in the refrigerator for 30 mins (or more).
  • Place the cake on a turntable, and add more buttercream to the sides. For best results, use a bench scrapper held at 90 degree at side of the cake, slowly turning the turntable and keeping a steady hand. *I watched a video from youtube on icing a cake which really helped.

My friends love the cake, and I had to say the chocolate sponge was very delicious and the flavor intense.

I'm looking forward to my next party!
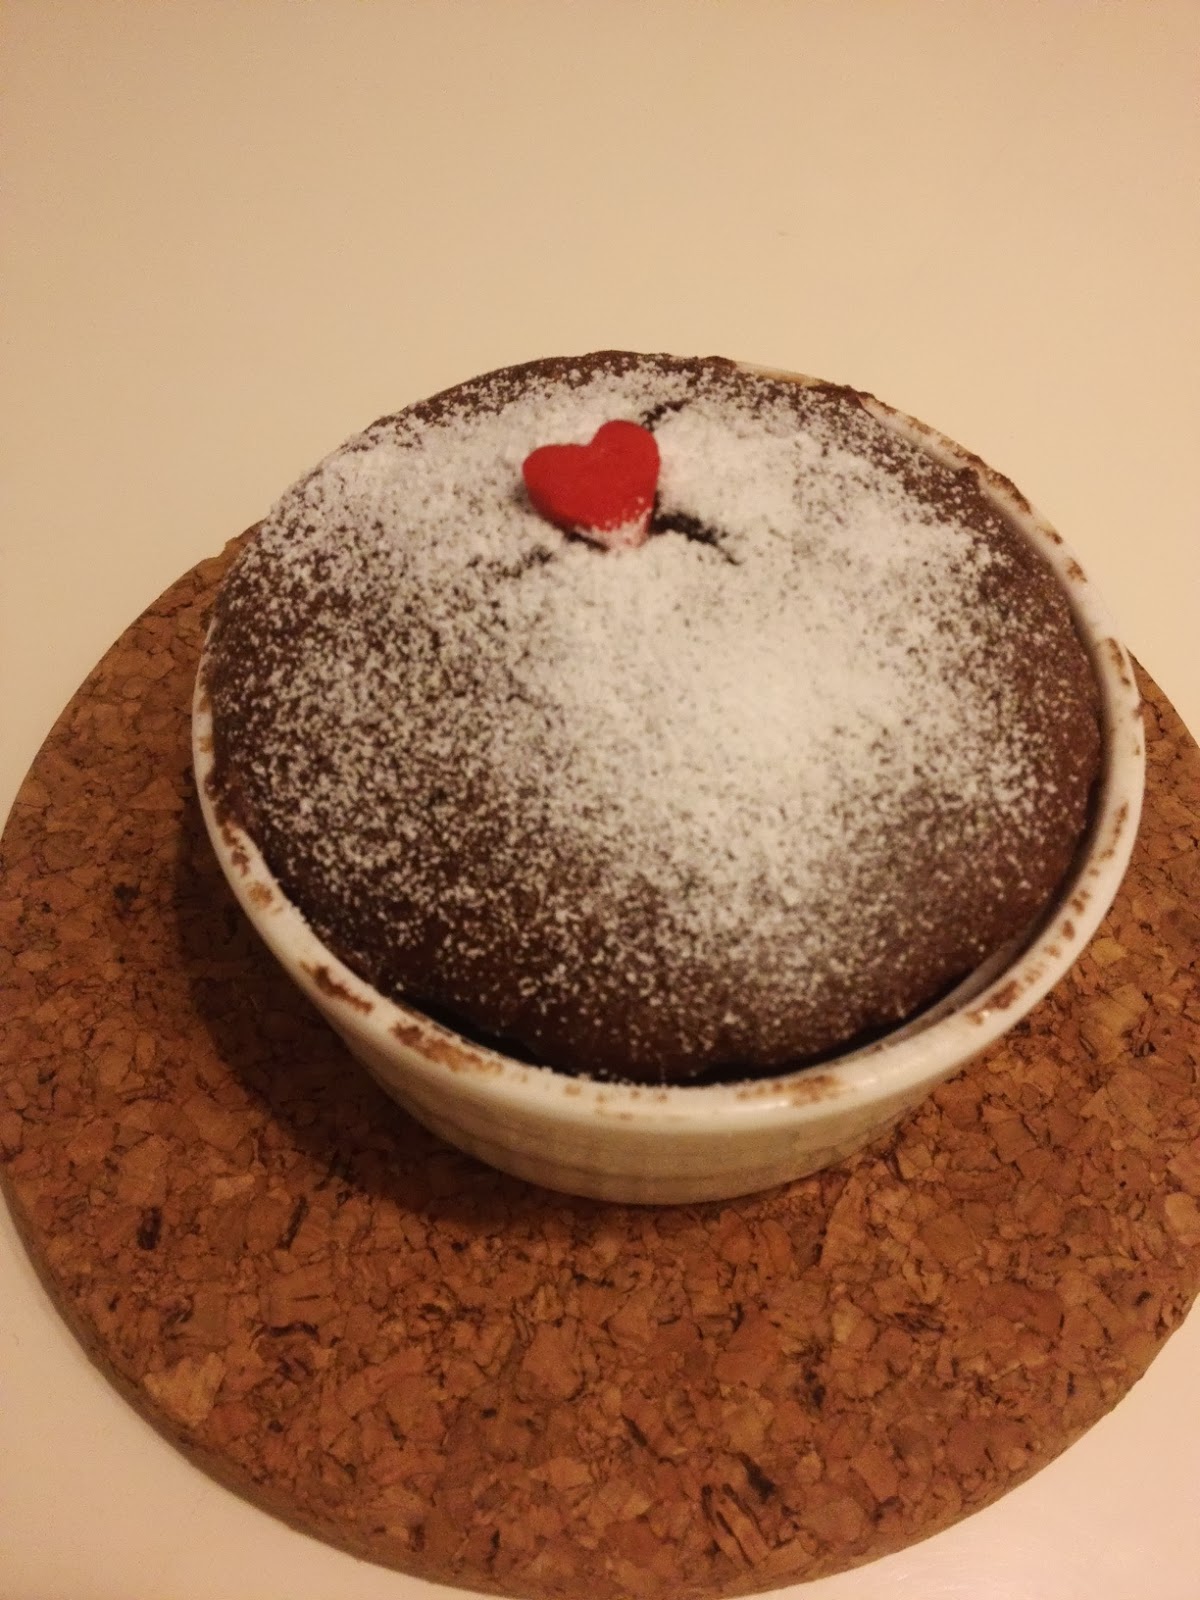
I had wanted to write this post earlier for Cook Like a Star - Curtis Stone organized by Zoe from Bake for Happy Kids. But the desire to rest was more appealing than writing. Nonetheless, as the saying goes "It's better late than never!", so here's my experience making souffle.


See how it puffed up when cooking. I just love that smile' on my souffle. Like all things made with a high percentage of egg whites, it tended to sink after coming out of the oven.


It was also my first time trying out a good quality chocolate. I used Callebaut 70%, and it was so good that I kept popping the chocolate bits into my mouth. The only thing I would modify for the recipe is to increase the quantity of sugar used.

(Modified for 2 person)
To check out the video, click here

Ingredients:
15ml unsalted butter, melted, cooled
25g sugar, plus more for coating the dishes (would increase to 40g next time)
2 egg whites
35g high-quality chocolates (62 to 70% cocoa)
40ml cold water
25g cocoa powder

Method:
Coat the inside of the souffle dish with melted butter. To use upward strokes when brushing as this would help the egg white to rise.

Refrigerate the souffle dish for a few minutes and coat on another layer of melted butter. Immediately, pour some sugar into the dish and shake around to coat the interiors evenly. Set aside.

Melt the chocolate in water bath. Remove from heat, and add in the water and cocoa powder.

Using an electric beater, beat the egg whites till frothy. Add in the sugar and beat till stiff peaks are formed. Fold the egg whites into the chocolate batter, and mix till even. Pour into the souffle dish.

Using a large knife/spatula, push the filling to the side of the dish and level off the filling. Wipe off the excess batter that fell onto the side of the dish. Bake for about 12 minutes.
I just got back from a 2 weeks holiday from Germany. It's full-fledged summer over there, meaning it's as hot as Singapore, except there's no haze. In countries where there's four seasons, I noticed the people are appreciative of sunshine and the warmth it brings - a good reminder for myself not to take clear skies for granted too!

Church Batholomas (Frankfurt)


Most beautiful church I ever saw - Dom Berliner


My fav pic of Berlin Wall - are you able to make sense of the pic?


Sausage!!


Nutcracker

Love the clouds - really look like those seen in Euporean paintings

Rumour has it - guys who rub her right breast would get good  luck with women!

The famous 'Disney' castle - Neuschwantein

Cute traffic men who wore hat - only found in East Berlin

Found this on the breakfast table -  it made me smile!


Beyond the beautiful sights, the trip really opened up my eyes to how Germans lead their life. I drew inspiration, in the hope of developing some of these values and habits they have. In gist, these are the lessons I've learnt from the trip:


- Be Patient
My husband and I were surprised to find that there's no "door close" buttons in the lift. We were told not to hurry, for the door would automatically close after you press the floor level you wanted to go. It was an uncomfortable feeling. I was tempted to keep pressing the button. But after a while, I kind of like the feeling of not rushing, and just allowing the lift door to close on its own.

- Re-defining how I work
 I've always heard how efficient the Germans are. They would start work early, and are allowed to knock off once the had finished their work. A relative of mine was working in Germany for 6 months, and he was given a warning letter for working overtime. That really says much - spending MORE time at work doesn't mean you are being more productive. I believe the Germans take pride in doing their job, well, but never at the expense of one's health or time with the family. I would love to end work on time, and I'm thinking how I can be more productive at work. 

- Joy of reading
I've noticed how the Germans/ Europeans love to read. Many of them would bring along a book to read while commuting on the train. That's a refreshing change from the sights I see on the MRT with most people either using their Ipad or mobile phones. It got me thinking when was the last time I read a book. does travelling books or fashion magazine count? I would love to pick up my books again, to enrich myself.

- Curiosity about own's heritage
I have learnt much about the rich history behind Berlin and Munich through the guided walks. It left me feeling intrigued and I even went to do my own research about King Ludwig II after visiting his famous castle (Neuschwantein). At the same time, it got me thinking how much do I know about my own country and what it has gone through.

I think it's a good idea to combine all I want to do - to read and learn about the stories of Singapore, and to make meaningful sense for self. That would be my new project!
There's been so much raves about the Ogura cake "Xiang Si Dan Gao" that I decided to try it too.


When I told my husband about it, he asked why is it called "Xiang Si", and so I did a little search on how it got its name. Supposedly the texture is so soft and light that you will miss it, and think of wanting to have it again. Sounds like people getting love-sick over.. er hmm a piece of cake.

But I do think it's romantic name, and a great way for couple to profess their love, or that meaning of "I miss you!" to each other.  I did a green tea flavour using the recipe from Min. However, when out from the oven, it tended to sink a bit, and crinkle up. 


See... the height seemed to have sunken. Hmm my egg white was beaten to soft peaks. Could that be the reason why? My baked japanese cheesecake also has this problem too. Can anyone enlighten me what had gone wrong? 

Recipe:
From Min's blog

Part A
Green tea powder (1tbsp mixed with 20ml hot water, set aside to cool before using)
Canola oil - 45g
Milk - 60ml
Salt - 1/4tsp
Egg yolk - 100g
Whole egg - 1
Cake flour - 65g

Part B
Egg white - 200g
Caster sugar - 65g (prefers a sweeter cake, and would increase to 85g)
Cream of tartar - 1/2tsp

For A:
Beat together the egg yolks, whole egg, green tea mixture, oil, milk, and salt till frothy. Add in the cake flour and mix well. Put aside.

For B:
Using an electric beater, beat egg whites till frothy. Add in sugar and cream of tartar. Beat till stiff peaks.

Mix in the beaten egg whites to (A). Pour into a 7 inch square pan, and steam bake in oven at 160C for 60 mins (Peng suggested baking at 180C so that it browns better). Remember to wrap the bottom of the pan with aluminium foil to prevent the water from seeping in.

As I found the cake not sweet enough, I sandwiched it with a layer of sweetened azuki beans.  I recently got a set of bento cutter and decided to play with it too. Voila.. amazing how it helped make the cake so cute. Haha.. this is my way to trick my husband to eat my cake.


Who can resist it now?
It's been a long while since I had a post. I have been wanting to write and to bake... but somehow it was difficult to summon energy for it. 

I began to wonder how I want my life to be - to fill it with work,  or at times allow myself to be idle and dream of cupcakes, cookies and the many things I want to bake in my kitchen.

And it was timely that I came to read this article by Tim Kreider. He talked about people who are afraid of having nothing to do, and therefore they try to fill their time with many things, and making sure they always have SOMETHING to do. These are the people whom you want to invite for lunch, and they would say "I'm busy" or "I'm sorry. I have too much work to do." Tim described this sense of busyness as being being imposed onto the person by themselves. I must admit that article got me a bit uncomfortable, and to question the way I use my time. 

He then went on to talk about the beauty of being idle, and I'll share with you my favourite part:
"The space and quiet that idleness provides is a necessary condition for standing back from life and seeing it whole, for making unexpected connections and waiting for the wild summer lightning strikes of inspiration." - Tim Kreider

This is but a simple reminder that when one has nothing to do, one may achieve a lot more.

Guess I'm not so bad afterall. I did manage to bake occassionally *gives a guilty face*, and I fulfilled my wish to bake this cute panda bread too.


Learning from my previous experience, which I felt the amount stated by the original recipe for the dough was too little, I decided to fall back on my milk loaf recipe. Hmm... but I encountered the same problem when trying to mix in the colors for my dough. What I got was a marbled colour, and I almost wanted to give up and just go to the Singapore Zoo to get some panda buns instead. 

Fortunately, once baked, the color still looked alright! 


Recipe
Bread dough - from milk loaf recipe

Coloring of the Panda Bread
1 tbsp green tea powder mixed with 2 tsp hot water
31/2 tsp of cocoa powder mixed with 11/2 tsp of hot water

Method
I followed the steps from lilmizlynn

It's been too long since I made bread using a pullman bread tin - thus overcooked the bottom a bit. Notes for self: To place the bread tin on the wire-like rack, instead of the black colored baking tray! 

Though I followed the guide by lilmizlynn, it does take a while to get the proportion right, and to build the shape. I may make the white portion smaller, and the green portion bigger. 


Have fun experimenting with the recipe, and enjoy the results of your hard work - a peering panda face!
New year, new beginnings! There are many things I can look forward to in 2013. I believe it would be good, and so it would be. Haha... That's me and my optimism! But if I were to add on for what I really want out of life, it would be purpose and fulfillment. And in the new year, I also hope to continue staying active - to exercise, and to take better care of self.

But I do have a few indulges. For one, I'm a fan of shepherd's pie. Think cheese, potatoes and more cheese! It's a great comfort food and this is a fantastic recipe shared by my friend. Most are made using minced beef, but mine is made using minced pork and chicken.


Preparing the Meat Sauce:
Ingredients
1kg of minced pork
200g of minced chicken
2 yellow onions, diced
1 bottle of tomato sauce
White cooking wine

Methods
Marinate the meat with herbs (i like rosemary), pepper, light soy sauce, sesame oil and cornstarch. Leave it in the fridge for at least 2 hours for the flavors to develop.

When ready to cook, heat up a large pan with oil. Cook the diced onions till it's softened (ie. translucent-looking). Add in the minced chicken and pork. Keep stirring till it's cooked.


Pour in the bottle of tomato sauce, followed by some water. Make sure there's enough liquid (like the picture below). At this point, you can add in more herbs if you like. Lastly, add in some white cooking wine. This helps to impart a nice subtle flavor.  Cook for a few minutes to let the alcohol evaporate. Turn off the fire and you should have a nice meat sauce now!


Preparing the Mashed Potatoes:
Ingredients
8 russet potatoes 
50g salted butter, melted
100g cooking cream, heated up

I happened to have cream on hand, thus decided to use this instead of milk. One can also play around with flavors and make it creamy with the addition of sour cream / mayonnaise.

Methods
Boil the potatoes with skin on till it's cooked and very soft.
Peel the skin off and mash the potatoes up.
Add in the melted butter and cream, and stir till it's well combined with the potatoes. For a stronger taste, you can add in more salt, black pepper and herbs (i add oregano) to the mixture.


Layering the Food:
In a large oven-proof dish, place the food in the following order:
- Mashed potatoes, Cheese, Meat sauce, Mashed potatoes, Cheese

I use a mix of mozzarella cheese and red cheddar for the middle layer.


As for the mashed potatoes, I like to spread it out thinly... Why? So that I can put in more meat sauce hee...


Finally, top off with mozarella cheese.


Bake in pre-heated oven at 200C for 20 mins till the sides are browned.


In all, the above portion can fill two rectangular baking dish. That's really a lot, which I served over 2 different Christmas parties. Though it requires a bit of effort to prepare, it's so yummy I'll probably do it again in smaller quantity for my family's consumption =)